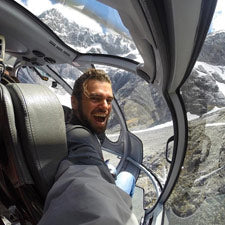
https://goworx.com/blogs/tips.atomGoWorx - Tips2018-08-25T15:47:00-05:00GoWorxhttps://goworx.com/blogs/tips/gopro-fusion-setup-tips-for-your-bike2018-08-25T15:47:00-05:002018-08-25T15:47:27-05:00GoPro Fusion - Mounting Tips for HandlebarsGoWorx ContributorA quick-start guide for mounting your GoPro Fusion camera to get a unique shot!
360-degree video is becoming increasingly more popular. In the days of virtual reality and first-person POV videos, people love being immersed in the action! Ever since GoPro came out with their version of the 360-degree camera - the Fusion - it has been gaining popularity. The abilities of this camera is exciting yet some people are still unsure how to best utilize it. In this blog post, I'll give you my tips on how to mount the Fusion to get unique shots on any vehicle with handlebars.
]]>
A quick-start guide for mounting your GoPro Fusion camera to get a unique shot!
By GoWorx Contributor Aaron Sullivan. Have an idea for a news story, photo series or gear guide? Let us know in the comments below or on social media.
360-Degree Videos Dominate!
360-degree video is becoming increasingly more popular. In the days of virtual reality and first-person POV videos, people love being immersed in the action! Ever since GoPro came out with their version of the 360-degree camera, the Fusion, it has been gaining popularity. With the GoPro Fusion camera you actually have 2 cameras, each with 180 degree fields of view, mounted back-to-back on the device. The camera automatically stitches the two videos together creating 360 degree, unobstructed views.
The abilities of these cameras are exciting yet some people are still unsure how to best utilize them. In this blog post, I'll give you my tips on how to mount the Fusion to get unique shots on any vehicle with handlebars.
Tip: use a screwdriver to tighten thumbs crews extra tight
1. Mounting.
Mount the GoPro Handlebar mount or (OCAM ZipMount) to the handlebars. I like to mount mine slightly off-center on the handlebars. I especially like to when I'm hitting the jumps on my dirt bike. This allows me to capture my upper body, bike, and views of the ground below me. It will really put your action into perspective!
2. Attach the Extension.
Attach the Fusion aluminum extension to the mount with the thumbscrews. Mount the bar leaning forward about 45 degrees. It looks strange but remember, these cameras capture everything! Also note, you can adjust the angle on this thumbscrew later - if desired.
3. Attach the Fusion.
Attach the Fusion camera to the extension mount. Keep the body of the Fusion camera aligned with the extension bar. This will ensure the extension pole completely disappears when the videos are stitched together. This is essential in achieving this unique type of shot! Tip: use the screwdriver to tighten the screws a little tighter to ensure the angle won't change during your ride. Just make sure you don't overtighten!
That's it, you're set!
Now go out and capture those perfect shots. Here are a couple photos I've taken with this setup. You can see more on my Instagram page @Azzaj!
]]>
https://goworx.com/blogs/tips/do-it-yourself-how-to-make-a-centripro-for-less-than-202018-07-15T11:37:00-05:002018-07-15T11:48:31-05:00Do It Yourself: How to Make an Orbital GoPro Video Device For Less than $20.Josh AbbeyA step-by-step guide to create a “Centripro” - a device used for orbital videos with your GoPro!
Chances are you’ve seen these cool orbital videos before. They’re typically in slow motion and show some interesting action 360° around a person. Shots like these are often achieved in Hollywood movies with expensive equipment like a 6-axis robotic arm. Most of us don’t have the budget for movie equipment like that. However, did you know you could make a similar video with a GoPro and a few inexpensive household items? There are many different ways to make this device. I’ve tried a handful of different methods and settled on what I think is the most effective and cost efficient.
]]>
A step-by-step guide to create a “Centripro” - a device used for orbital videos with your GoPro!
By Josh Abbey,GoWorx Member This is the third article in our series by GoWorx Contributors. Have an idea for a news story, photo series or gear guide? Let us know in the comments below or on social media.
What is a Centripro?
We’re guessing the term “Centripro” comes from the words centrifugal + GoPro; basically implying you’re going to spin the camera around in circles using centrifugal force. The centripro device we’re making today is essentially a GoPro mounted to a clothing hanger and spun around your head with fishing line. The origins of this homemade device were said to come from an action sports guy named Nicolas Vuignier. Apparently he made the first one for his iPhone, a Centriphone, and then developed a version for the GoPro - a Centripro.
GoPro Mounted to homemade Centripro
Chances are you’ve seen these cool orbital videos before. They’re typically in slow motion and show some interesting action 360° around a person. Shots like these are often achieved in Hollywood movies with expensive equipment like a 6-axis robotic arm. Most of us don’t have the budget for movie equipment like that. However, did you know you could make a similar video with a GoPro and a few inexpensive household items? There are many different ways to make this device. I’ve tried a handful of different methods and settled on what I think is the most effective and cost efficient.
What you'll Need:
Supplies:
GoPro (any works, Hero 6 is best) + Sticky Mount & Clamp
Wood Hanger
Strong Clear Fishing Line (at least 20 feet)
Flagging Tape
Packaging Tape
¼” x 2” Bolt
3 washers (that fit on the bolt)
Key ring
Zip Ties (optional)
Wooden Dowell or Wooden Rolling Pin Handle
Tools:
Pliers
Drill + ¼” or ⅛” drill bits
Scissors
Centripro Supplies
Step by Step: How to Make a Centripro:
Step 1: Remove the metal hanger
and wooden cross pole.
Step 2: Peel and place the GoPro sticky mount centered at the apex of the hanger.
Make sure the mount is centered and aligned.
This portion of the hanger may have a slight curve to it so be sure to press and hold the sticky mount firmly until adhered.
Step 3: drill a hole near the end of each leg . You can use ⅛” or ¼” drill bit.
Step 4: Attach the GoPro clip to the mount.
Optional: I used zip ties around the clip to ensure that the mount would stay attached. I wrapped 2 zip ties and secured them around the base of the clip in case the sticky mount failed. You could also use duct tape. Zip ties or duct tape isn’t required but gave me peace of mind knowing the GoPro would be extra secure to the hanger.
Step 5: Cut 5 to 10 strips of flagging tape at about 18” long.
These flags are what will keep the Centripro stable while it’s being swung around your head. Stack all the strips of the flags and tape them together at one end.
Once taped together, pierce a hole through that taped end of the flags.
Step 6: Attach the key ring through the hole of the flags.
Then attached that keyring through one drilled hole of the hanger’s leg.
Step 7: Lace the fishing line through one hole and tie multiple strong knots.
Pull out at least 15 feet of fishing line and cut it.
Lace the other end of the fishing line through the other drilled hole on the opposite hanger leg (the hole with the key ring) then tie multiple strong knots.
Step 8: Pull both ends of the fishing line out about 2 feet and tie them together to create a V shape.
Step 9: Tie a knot to a washer about 3 feet down from the V knot.
Cut off any excess fishing line.
Note: The total distance from the hanger’s legs to the end of the fishing line should be about 5 feet. (this is a good radius for swinging the camera and capturing video of yourself without being too far away).
Step 10: Sandwich the washer with the fishing line between the other two washers onto the bolt.
Next, drill that bolt into the end of the wooden handle or dowel.
Be sure not to drill it all the way into the wooden handle - leave a couple millimeters of space so the centripro can spin with as little friction as possible.
Boom, you're done!
Final Step: Go Try it out! The video looks best when filmed in slow motion (See our previous blog post here on how to shoot slow motion with the GoPro). I’ve found the best video settings with the Hero 6 are 2.7k at 120FPS with the “video stabilization = ON”. This will help with any shakiness that may occur when swinging the camera around in circles.
Make sure your GoPro is securely locked into the clip mount. Then angle the GoPro so the LCD screen preview doesn't show the hanger’s legs in the shot. Once the angle looks right, tighten the thumb screw tight.
Filming Tips:
When spinning the Centripro, make sure you start slowly with a lot of open space around you. The GoPro should be hanging upside down and the flagging tape should be on the trailing end of your spins. Do a couple test spins and check the video on the GoPro to be sure you're captured your body and none of the hanger.
Try doing an activity that will look cool in slow motion. For example: running, jumping, throwing a handful of leaves, spraying water, etc. Get creative with it! Once you’re done filming, bring the video into your preferred editing software and slow down the video for a cool bullet-time effect.
Were you successful in making a centripro and filming an activity? We’d love to see it! Let us know in the comments or tag #GoWorx on Instagram with your Centripro videos. We may feature your stuff on our social media platforms!
]]>
https://goworx.com/blogs/tips/goworx-member-tips-how-to-shoot-slow-motion-with-the-gopro-hero-62018-04-19T12:56:23-05:002018-04-19T12:56:23-05:00GoWorx Member Tips: How to Shoot Slow Motion with the GoPro Hero 6GoWorx Contributor
Have you always wanted to create slow motion video with your GoPro? Check out this GoPro slow motion guide and learn how to achieve buttery smooth slo-mo video that takes your action scenes to the next level.
By Josh Abbey In my opinion, the GoPro Hero 6 has the best slow motion capabilities of any action camera on the market today. In this post I’ll touch on how camera and video frame rates work, how I use my Hero 6 to capture slow motion and offer a couple video editing tips to help you capture your best slow motion moments!
]]>
Have you always wanted to create slow motion video with your GoPro? Check out this GoPro slow motion guide and learn how to achieve buttery smooth slo-mo video that takes your action scenes to the next level.
By Josh Abbey, GoWorx Member This is the second article in our series by GoWorx Contributors. Have an idea for a news story, photo series or gear guide? Let us know in the comments below or on social media.
Why Slow Motion?
Ever since I was a kid, I've been captivated by slow motion in film and on TV. I loved the slow, fiery explosions, epic football replays and time-bending Matrix-esque scenes. I’ve grown up trying as many sports as possible; all while attempting to capture the most radical moments to show friends and family. Slow motion was one of my favorite ways of showing those moments.
Since only a few years ago, action cameras have been nearly non-existent. I received my first GoPro in 2014 and have since been using it to try and tell a great story. In my opinion, the GoPro Hero 6 has the best slow motion capabilities of any action camera on the market today. In this post I’ll touch on how camera and video frame rates work, how I use my Hero 6 to capture slow motion and offer a couple video editing tips to help you capture your best slow motion moments!
What is Video, Anyway?
Simply put, video is just a series of photos, called frames, shown in sequence at a certain speed that makes the pictures appear to move, creating motion pictures. Think of a photo flip book, for example.
First motion picture ever made 1878, Wikipedia
What is a Video Frame Rate?
A video’s Frame Rate is the frequency at which those frames (photos) are displayed per second, measured in Frames Per Second (FPS). Every video you’ve ever watched is just a series of images displayed at a certain speed. With video editing software, you can export your video at many different frame rates. Whatever frame rate you choose to export your video will determine how the final video is perceived by the viewer.
Some movies, videos and video games are played at a higher frame rate, like 48FPS, and can appear more realistic. For me, those types of videos appear too sharp and distracting when motion is happening. My brain needs some motion blur. So I always export video at 24 FPS. You can export your videos higher. However, I recommend never exporting a video lower than around 24 frames per second for a few reasons:
The average frame rate we see in television and film industry is 24 frames per second. We’re conditioned to watching online videos, movies and TV shows at this frame rate. It is referred to as a “cinematic” look.
We’ve learned that the human brain can start to perceive the individual photos if the video is played back at 12 frames per second. Any slower than that, then the video will look like a choppy slideshow of images.
Video: 24 FPS vs. 12 FPS
Best GoPro Frame Rates for Slow Motion
The frame rate number captured by the camera can be different than what you export the final video frame rate for viewing. The higher the FPS number you choose when filming, the slower and smoother your slow motion will look when slowed down to 24 FPS. GoPro and other cameras allow you to change the frame rate by choosing an FPS number in the settings. The GoPro Hero 6 allows for 24, 30, 60, 120 and 240 FPS options.
I always export my videos for viewing at 24 frames per second for that cinematic look mentioned earlier. I use Adobe Premiere or After Effects to edit my videos to export at that frame rate. Before filming I do simple math to help me understand how the final video will look after it’s slowed down in the video editing software. When exporting the final video at 24 FPS I always consider these rules:
Filming at 24 FPS won’t allow me to slow the video at all since the final exported video will be viewed at 24 FPS. Think of this as real-time viewed at 100% speed.
Filming at 30 FPS will allow me to slow down to 24 FPS video, which is 80% of real time. (24/30 = .8)
Filming at 60 FPS will allow me to slow down to 40% of real time.
Filming at 120 FPS will allow me to slow down to 20% of real time.
Filming at 240 FPS will allow me to slow down to 10% of real time.
Seen here in this video example below, I filmed my friend jumping with the GoPro Hero 6 and slowed it down at those percentages mentioned previously:
Comparison of Slow Motion Speeds with GoPro Hero 6
It’s also important to note that the higher the GoPro’s FPS setting, the more restricted you are on video resolution. If you want an entire video in 4K for example, don’t plan on shooting higher than 60 FPS. GoPro just cannot process data rates that high. But 4K at 60 FPS is pretty epic.
Rules of thumb for capturing great slow motion:
Always shoot high FPS in bright (preferably sunny) situations. Never shoot 120 or 240 FPS in low light, as it will look grainy and yield low quality video. I even avoid high frame rate filming indoors with artificial lighting because most lights will flicker when the video is slowed down and will ruin the shot.
Plan for slow motion shots and choose what you’ll film ahead of time. Try and use the slow motion clips to help tell a story or emphasize a moment. Use slow motion in situations where action and speed are apparent. Anything affected by gravity is a great example. Your brain knows what falling objects look like.
For example, I use slow motion to film when someone is jumping:
When leaves are falling:
When water is splashing, etc:
Gravity-assisted shots like these will further emphasize the slow-motion effect because the viewer knows what that situation is actually supposed to look like in real time. But basically, as a rule, when the filmed subject is in motion and there is action, slow motion will look interesting:
This is what makes GoPro great, when it’s used as intended it truly is an action camera!
Try and keep the camera as stabilized as possible when filming in a high frame rate. This will help draw the focus to the subject being filmed, rather than a moving environment. Also you don’t want shaky videos when you’re creating slow motion clips. Keep in mind that the the internal video stabilization will be disabled when filming at 120 & 240 FPS (in their highest resolutions). So I always use a motorized gimbal, like the Karma Grip, or a tripod when filming at those frame rates.
But if you can’t muscle up the money for a gimbal, the all-metal GoWorx Original Handle Pro gives your shots a good amount of stabilization with its weighted design. Plus, it can double as a tripod in a pinch with its flat-bottomed base.
Here are my GoPro Protune settings for slow motion clips:
SHUTTER = AUTO
EV COMP = 0
ISO MIN - ISO MAX = 100-400 (In bright light)
WB = AUTO
SHARP = HIGH
COLOR = FLAT
AUDIO = OFF
I also keep “video stabilization ON” whenever possible:
Use it, Don’t Overuse it!
As mentioned before, I believe that slow motion should be used to help tell your story. I like using it when the situation calls to highlight a specific situation. But since slow motion looks so cool, you may have the tendency to overuse it. I recommend trying to save it for special moments to really make those situations stand out from the rest.
In one example of a GoPro video I made while visiting Cuba, I used slow motion to capture and emphasize one of the best moments from the trip. A local Cuban lady allowed me to film her in the street as we walked by. Her character and persona helped set the mood for the video. I was able to use slow motion as a way to highlight her eyes and inviting facial expression:
Speed Ramping with a GoPro
Once you've decided which clips to slow down, you then need to decide how you want want to reduce the speed. Do you want to abruptly stop time and cut straight to the clip in slow motion? Or would you rather gradually ease into the slow motion effect? I highly recommend gradually changing speeds from faster motion to slower motion, also known as speed ramping.
There are plenty of tutorials on how to achieve this, here's one of my favorites by Justin Odisho. The key is to establish some context of the video in a faster speed, let's say 100% real-time, then gradually slow it down at the point of interest. This helps the viewer understand the differences in speed when it's used on the same clip.
Here is an example from a video I made of my adventures last year. I used a lot a speed ramping to help transition from clip to clip. Here I was spinning the GoPro over my head in real time then I speed ramped the video down to about 20% real-time to capture my dog jumping for a stick:
Slow Down the Sound
Another aspect of slow motion that I love to enhance is the sound. It can really immerse a viewer into the environment when not only the visual clip slows down but the surrounding sounds are also slower. If the sound captured by the GoPro isn't that great for emphasis, I'll add extra sound effects to the environment.
The following is a promotional video I made for a friend. I recorded audio of her breathing, added a heartbeat sound and added seagulls screeching (free sounds found online). You can hear all sounds slow down when the video slows to emphasize the drama:
Super Slow Motion with a GoPro
In that same promo video above I was able to slow the video down to just two-percent of real time! This is because I used third-party plugin software. There are a few plugins that can slow down your footage to these speeds without making it choppy. The one I used here is Twixtor and is installed into Adobe After Effects. This tool essentially creates more frames between the existing video frames by interpolating the footage and fabricating new frames. Twixtor is a little expensive so I wouldn’t recommend purchasing it right away. Instead try the free trial and see if it’s something that could work for your projects.
Bottom Line: Tell YOUR Story
Shooting slow motion with a GoPro will always be fascinating to me. I love exploring new ways to tell a great story by using my GoPro Hero Camera. That passion has extended from my childhood and still motivates me to go and capture more epic moments each day. I encourage all of you to venture out and document different aspects of your life on video. Any story you want to share can be a good one. It’s how you share that story that can make it an amazing one!
About Josh
Josh Abbey is a videographer and content creator from Miami, FL who loves to travel and tell his story in the most creative way possible. Follow him on Instagram (@josh.is.trippin) and be sure to subscribe to his YouTube channel so you can get updates on all of his fresh content as soon as it's released. He has lots in the works this summer, so stay tuned!
Josh is also a GoWorx Member (that's where he got that sweet shirt!). Tap here to find out how you can become a GoWorx Member and get access to our members only community and other solid perks.
About GoWorx
We inspire next-level content creation with our hand-picked selection of GoPro, DJI and Smartphone Gear. See how our community creates with GoWorx when you follow us on Instagram, Facebook and read up on news and tips on our GoWorx blog.
]]>
https://goworx.com/blogs/tips/gopro-travel-tips-top-10-ways-to-get-the-most-out-of-your-gopro2018-02-22T14:30:00-06:002018-02-22T14:39:09-06:00GoPro Travel Tips: Top 10 Ways to Get the Most Out of Your GoPro While TravelingGoWorx Contributor
Want to step up your GoPro travel photography? Planning to go on vacation with a GoPro? Check out our member-written guide to GoPro travel photography, which outlines 10 ways to get the most out of your GoPro while traveling the world.
In our opinion, the absolute best camera for traveling is a GoPro. So we thought it appropriate to write a photography guide for traveling with a GoPro, featuring our ten favorite travel tips to get the most out of your GoPro whilst on the move!
]]>
Want to step up your GoPro travel photography? Planning to go on vacation with a GoPro? Check out our guide to traveling with a GoPro, outlining 10 ways to get the most out of your GoPro while abroad. By Godwyn Walker, GoWorx Member This is the first post in a brand-new series by GoWorx Contributors. Have an idea for a news story, photo series or gear guide? Let us know in the comments below or on social media.
Why We Capture
Being on the road and hitting destination after destination is truly a rewarding experience itself, but capturing priceless memories you can relive year after year (AND share with your friends and family) is one of the reasons we love to travel in the first place. For those of us who can't live in a constant state of wanderlust, we rely on these memories to get us from vacation A to B. And photography has become more than a hobby for a lot of us, so with every trip comes the fun challenge of capturing the best moments, scenery and culture.
In our opinion, the absolute best camera for traveling is a GoPro. So we thought it appropriate to write a photography guide for traveling with a GoPro, featuring our ten favorite travel tips to get the most out of your GoPro whilst on the move!
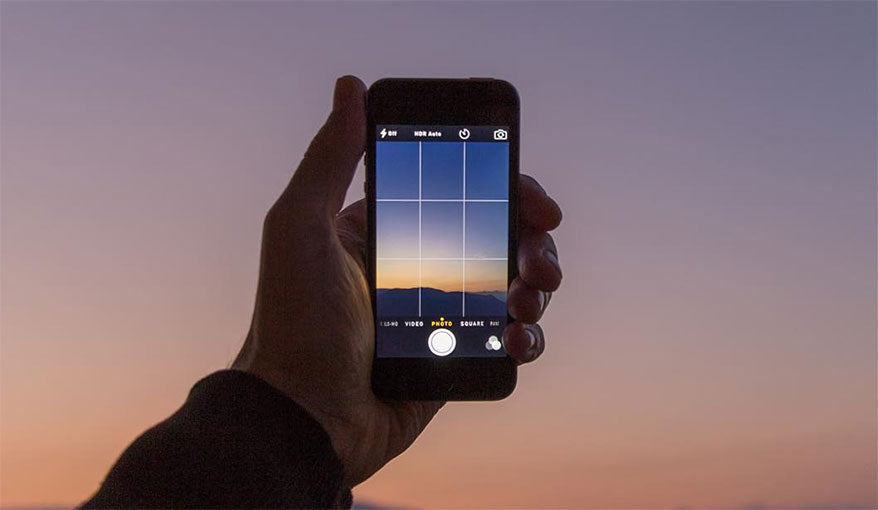
Photo Mode, ISO Min/Max 100, ProTune On, GoPro Colour, Wireless Remote for trigger
Tip #1: Shoot On The Move
Bags packed? Check! Taxi? None available! It's time to walk this one out… but not without taking a selfie on the way! Capture yourself and your bags embarking on the next travel destination.
This type of shot is great for quick updates to social media or blogs when you're in route to your next destination, but sometimes you can click solid candid shots while on the move. Using any GoPro Pole will be more than perfect for capturing shots on the move.
Just when you think there's no better feeling than trying something new, you can go a step further and freeze-frame the moment as it's happening. For this kind of image, all you need is to be adventurous!
Whether you grab your GoPro pole and fly down a waterslide or clip on your helmet mount and shred down a mountain, capturing the action brings your audience along for the ride. To get action shots we recommend using a wireless remote to help freeze that moment in time or pulling a still image from a video file, but either one works.
Photo Mode, ISO Min/Max 200, ProTune On, GoPro Colour, Wireless Remote for trigger
Tip #3: Take the Ride Less Traveled
Island hopping is one of our favorite excursions whilst traveling! Whether you’re hitching a ride through the desert on a camel, zooming around Bangkok on a noisy tuk tuk or crashing through the waves on a traditional long-tail boat, capturing all your different ways of traveling from A to B is perfect for storytelling!
To get the shot, don’t be afraid to ask for a window seat or a back seat on the bus, and be sure to be careful when hanging out of a tuk tuk. Sitting in the right spot does wonders for a picture, so get out there and find the best seat and snap away!
Photo Mode, ISO Min/Max 100, ProTune On, GoPro Colour, Wireless Remote for trigger
Tip #4: When It's Just You Two, Snap a Third Person View
While on the move, it can be troublesome trying to get you and your traveling partner in a picture together. Asking a fellow tourist or local citizen may not always be an option, and that's where the action cam pole comes into play! This simple, yet super-effective accessory allows you to capture that third person's view and with a little panning, you can almost capture the whole road ahead.
Timelapse Mode 5 seconds, ISO Min/Max 100, ProTune On, GoPro Colour, 50/50 Dome
Tip #5: Get Creative Wherever You Are
It's a whole new world when you’re underwater, so be creative with it! Jump in with your clothes on, grab a few props and with a little spontaneity you can create quirky and interesting pictures that stop Insta-scrollers in their tracks. The signature underwater beer bottle pose never gets old, just don’t crack it open until you're out of the water! When there is so much to see below the surface and you’re surrounded by beautiful scenery on dry land, a 50-50 Dome is the hands-down, must-have accessory for capturing imaginative pictures like the one above.
Still frame from Video, Video mode : 4K 30 FPS, Protune on, White Balance Auto
Tip #6: Set Up Scenic Shots
Scenery is truly something you cannot overlook while traveling with a GoPro. With jaw-dropping views at hand, you'll find yourself staring into the distance and just taking it all in. One of the best ways to take GoPro travel photos is by positioning yourself looking out into the distance with your back to the camera. This creates the ideal angle to capture your views and yourself all in one take. And remember: with a great view comes great responsibility to transform what you see into an image that you would hang in your front room.
You may need a tripod to get professional scenic shots with a GoPro. Check out the Pakpod Adventure Tripod for GoPro for a super sturdy GoPro tripod.
Photo Mode, ISO Min/Max 100, ProTune On, GoPro Colour, Wireless Remote for trigger
Tip #7: Get Wild with Animals
With cat and dog videos taking over the internet, it's only natural to whip out your camera when your pet does something funny! But when you trade cats and dogs for elephants or monkeys your shot becomes even more wild!
If you happen to visit a location that's home to exotic animals, whether in sanctuaries or their natural habitats, chances are you’ll be overwhelmed with excitement and you might even get lucky with a hands-on experience. Before the moment is over, be sure to snap a few memorable animal shots with your GoPro that you will look back on with a smile. To easily ensure that you don't miss a second of magic, strap your GoPro to your head or chest and let the camera do the rest.
Pro Tip: Be considerate of the animals and their handlers and ALWAYS give wild animals plenty of space...they are wild after all!
Photo Mode, ISO Min/Max 100, ProTune On, GoPro Colour, W/B Auto
Tip #8: Pack Light
This tip cannot be any more important for a traveling abroad with a GoPro. If you’re anything like us, you have a drawer at home that contains various GoPro mounts, multiple GoPro accessories and hundreds of thumbscrews! However, whilst hauling all of your travel essentials on your back, you will be glad you packed light (or wish you did!). So be sure to only pack what you know you will use.
If you need a little help with organization (or slimming down your GoPro camera bag), the GoScope ProFlex GoPro Case accessory bag is perfect for holding your absolutely essential GoPro accessories.
Video mode 4K 30FPS , ISO Min/Max 100, ProTune On, White Balance: Auto
Tip #9: Capture Bloopers
You can spend minutes, even hours, positioning your camera in the right angle. You’ve got the lighting just perfect and even mastered your signature pose… however, not everything always goes according to plan! But capturing the “I’m not ready” photo doesn't have to be a bad thing. It can result in a funny, wacky picture that will have you and your friends laughing over and over. Unexpected shots are also excellent for capturing one-of-a-kind facial expressions. And when making a video or slideshow, a few blooper shots at the end are a great way to end on a fun note and show your audience your sense of humor.
Photo Mode, ISO Min/Max 100, ProTune On, Colour Flat, Wireless Remote for trigger
Tip #10: Enjoy Yourself
Easily the most important GoPro tip of all is to enjoy yourself! Take it all in, hit as many golden hours as you possibly can, bring your camera everywhere you go, let your hair down and don’t stop taking pictures until your fingers go numb. Remind yourself why you embarked on this journey and do your best to express that sentiment when telling your story through your photos and videos.
About Godwyn Walker
Godwyn Walker is a photographer and content creator from the UK who loves traveling the world, making priceless memories and constantly improving his his GoPro photography skills. Check him out on Instagram (@GD0ggy) and follow his latest adventures on Facebook here. He is currently traveling through New Zealand with his partner (Instagram: @amiarmstrong) so be sure to check out their journey as it unfolds.
Godwyn is also aGoWorx Member (that's where he got that sweet shirt!). Tap here to find out how you can become a GoWorx Member and get access to our members only community and other solid perks.
About GoWorx
We inspire next-level content creation with our hand-picked selection of GoPro, DJI and Smartphone Gear. See how our community creates with GoWorx when you follow us on Instagram, Facebook and read up on news and tips on our GoWorx blog.
]]>
https://goworx.com/blogs/tips/how-to-film-skiing-snowboarding-with-a-gopro-10-classic-shots2018-01-26T18:47:00-06:002018-02-01T14:37:52-06:00How to Film Skiing & Snowboarding with a GoPro: 10 Classic ShotsJeff Miesbauer
Sick of shooting mediocre GoPro ski and snowboard footage? Our Top 10 GoPro Shots for Skiing & Snowboarding can help you master multiple perspectives and capture your snow skills like never before.
Whether you’re just getting into the GoPro game or need a little extra flavor in your shred footage, these 10 essential GoPro angles will add variety and head-turning perspectives to your ski and snowboard photography.
]]>
Sick of shooting mediocre GoPro ski and snowboard footage? Our Top 10 GoPro Shots for Skiing & Snowboarding can help you master multiple perspectives and capture your snow skills like never before.
Whether you’re just getting into the GoPro game or need a little extra flavor in your shred footage, these 10 essential GoPro angles will add variety and head-turning perspectives to your ski and snowboard photography.
Variety Is the Spice of Epic Edits
Take a closer look at your favorite ski and snowboard films and make note of the different perspectives. You’ll see everything from helmet-mounted POV shots to aerial photography to time-lapse sequences and beyond.
Editing different perspectives into your movies will keep your viewers on their toes and engaged, which will help you grow your following…or just make your friends jealous of your epic pow runs.
Even if you don’t have access to a helicopter, you can add awesome new perspectives to your arsenal with the right gear and a little know-how. Below are 10 classic GoPro shots for skiing and snowboarding that can help open up your creativity and enable you to capture next-level content while on the mountain.
1. The Pole Shot
Photo: @wiley_one
The most popular GoPro ski and snowboard angle these days, the pole shot lets you frame yourself, the snow and the scenery all in one shot.
And it doesn’t take much to tweak the angle…just angle the pole behind you.
Necessary Gear
To get a pole shot you’ll need…uh...a pole (duh). Here are some of our favorites for skiing and snowboarding.
For skiing and snowboarding, we love the UKPro’s burly metal design and quick adjustability. It also comes in a 54-inch version for extra reach.
Or try the UKPro Pivot to get snowy selfie shots without getting the pole in the frame.
Want a little extra flavor in your pole shots? Try the MicroJib and fully pan and tilt your GoPro for dynamic, sweeping shots of your perfect run through the park.
The original POV perspective and probably the first GoPro mount on the mountain, the helmet mount is a true classic.
Video by @kmarshnc
With a helmet-mounted GoPro your neck acts as a natural gimbal to reduce vibration, and since the camera captures everything you see you don’t have to change anything. Just point it.
Change it Up
To change things up (nobody want’s to watch 20 minutes of one perspective), you can rig your helmet mount to face downward and get a totally new perspective for your edits.
Video by @proud_to_be_a_cripple video in La Plagne, FR
Necessary Gear
You can easily mount your GoPro to a helmet with the camera’s included Curved Adhesive Mount, but if you’ve already used (or lost) that mount or want a less permanent solution you can try a zip mount or suction cup mount. See below:
Simply thread the zip ties through your helmet’s vents for a tight hold. You can also use the Zipmount to convert any ski pole into a GoPro Pole in seconds. Pretty rad.
This GoPro suction cup mount has a super strong hold (like sticks to an airplane wing strong) so you can attach it to your helmet, board (see below) or anywhere else there's a smooth semi-flatish surface without leaving permanent adhesive residue.
3. The Chest Mount
More useful for forward-facing skiers, the chest mount is a more discreet way to get a POV perspective.
Skier: Casey Durbin, Edit: Rob Hurst
Chest mounted GoPro shots include the skier’s arms, creating a centered look that may further stabilize ski footage.
Necessary Gear
The GoPro Chesty Mount works, but if you want the same perspective without the straps, try a GoPro backpack strap mount.
Just slide it onto a backpack strap, lock it down and drop in! Plus you can use the Capture P.O.V. on almost any strap…including boot straps (see below).
4. The Boot Mount
A truly creative GoPro perspective, the boot mount gives you an unparalleled view of your board or skis as they carve down the mountain.
Video: @your_mikeness
BONUS: because your camera is mounted so close to the snow, the boot mount makes it look like you are traveling at ludicrous speed! Downside: it doesn’t really work in deep snow.
Your GoPro slides right into this GoPro strap mount with the GoPro quick-release mount included with your camera. This Incase strap mount works on most straps and may be your new go-to mount for your adventures on AND off the mountain.
5. The Board Mount
Another original GoPro perspective, the board mount gives you a larger-than-life vibe thanks to your GoPro camera's wide-angle lens. It pretty much just makes you look like a rockstar, which could be just what you're looking for in your shred edits.
Photo: @miinapr
Necessary Gear
Again, you can achieve this with the GoPro sticky adhesive mount that came with the camera, but we'd recommend the BRLS Removable GoPro Suction Cup Mountbecause it has a super-solid hold and doesn't require drilling or sticking anything permanently to your board.
6. The Follow Shot
Maybe the most dynamic and exciting shot in the bunch, the follow shot is our favorite way to showcase the tricks and fluid motions of skiers and snowboarders.
Video by The Daily Pow in Utah.
Necessary Gear
You can get the job done with a good helmet mount or you could get super fancy and spring for a 3-axis gimbal. There are lots of options out there. But we'd recommend keeping it simple with a tried and true GoPro grip like one of these:
Wielded the world over, our popular GoKnuckles are comfortable in the water, on the snow or really anywhere. All you do is attach your camera, press record and follow your buddies as you rip up the mountain all day.
GoScope designed this simple GoPro grip so you could rig up two GoPro Hero Cameras at the same time. That way you can get simultaneous shots of yourself AND your friends tearing up the deepest powder of the season. How neat is that?
7. The Skate Shot
Borrowed from our concrete rolling friends in the city, the skate shot gives your subject a larger-than-life vibe thanks to its low-angle perspective. When you combine that with GoPro's wide-angle lens, you get pretty rad imagery that makes any Jerry's run through the park look decent.
Rider: Casey Durbin, shot with the Original Handle
Necessary Gear
You can do any amount of acrobatics with poles, grips or helmet mounts to get great low-angle skate shots, but the absolute best GoPro accessory for skate shots has got to be our Original Handle:
Designed to get your GoPro as low to the ground as possible, our Original Handle delivers the low-angle footage your hard-hitting park edits and night rail sessions need. Plus, you can get an all-metal Handle for an indestructible, stable platform that's ready to film your rowdiest season edit yet.
8. The Static Shot
Every edit needs a scenic time lapse or two, and the static shot gives you a chance to enjoy an apres beverage while your GoPro does all the work. Static just means not moving, and it's a great way for solo shredders to get photo and video of themselves in the park. Just set your camera on the lip of the pipe or next to the park feature, set it to video or burst mode and get shredding.
Static shots allow for time lapse sunset shots and give your amateur snowboard movie a professional vibe. They also allow your audience to take a visual breather from all of the skiing or snowboarding action.
Necessary Gear
As you can see above, our Original Handle is a great platform for filming static shots and time lapses.
The BRLS Removable GoPro Suction Cup Mount is also great for static shots because you can stick it almost any park feature (wall rides, boxes, flat rails, picnic tables) and it will also stand up on its own on the edge of a kicker or halfpipe.
For a more robust, sturdy tripod for GoPro cameras, you can try this:
Adjustable legs and "Ninja stakes" let you anchor this beast into the snow, stick it into the side of kickers or set it up almost anywhere, so you can film the whole squad playing follow the leader over your park's biggest kicker. Plus, it's burly waterproof design will last.
9. The Point-and-Shoot Shot
When expanding your GoPro photographic repertoire, its important to learn how to use your GoPro Hero camera as a traditional point-and-shoot camera. When capturing incredible days on the mountain with poles, helmet mounts, etc. it's easy to forget that the GoPro Hero Camera is just a super solid camera for taking stills as well as HD video. The point-and-shoot shot is just using your GoPro like a traditional photographer: standing still and shooting your subject in the best framing, lighting and interesting positioning possible.
Killer GoPro still photo by @coberschneider
Usually these type of shots take a little planning and choreography with your riders or skiers, but they require you to be absolutely still (for photos) or pan slowly (for video). So if you're halfway down the chute (in a safe spot), stop and let your friends slide by while you record video. Or post up next to the kicker and let your friends throw big floaty 3's while you soak up all the rad footage.
Necessary Gear
The name of the game here is stability. The more stable you can make your GoPro, the better quality photo and video you will capture.
Poles, like the UKPro poles above and our GoWorx GoKnuckles or Original Handle will work with some practice. These are a great option for getting point-and-shoot shots in the middle of a run or when you're in avalanche terrain and don't want to hang out very long.
The most stable you're going to get is a tripod, and the Pakpod Adventure Tripod is truly a great tripod for GoPro users.
Designed exclusively for the new GoPro Hero 6 Camera, this GoPro trigger pole connects you directly to your camera's shutter button so all you have to do is...you guessed it: point and shoot.
10. The Drone Shot
Unless you have regular access to a helicopter (DM us!), a drone is the best way to shoot truly spectacular GoPro ski and snowboard photography. The sweeping shots of a rider perched atop a jagged ridge line, the aerial follow shots, the Super Duper Park shots...it all just seems so much bigger with a drone.
This video by @jorgemiarnau in Andorra does a great job of cutting in drone shots as well as follow shots and point-and-shoot shots.
There are some variations on the drone shot, and experimenting with your machine and your crew is the best way to get the best imagery. Try mixing it up with top-down views, flybys, scenic background shots and any number of aerial follow shots. The best way to get inspiration is to follow other drone photographers and see what they are doing.
Try following these photographers for snowy aerial inspiration:
Of course, you'll need a drone to get drone shots. There are several options out there that produce professional-grade photography with (or without) a GoPro Hero Camera. Here are some of our favorites...
2. The GoPro Karma Drone - We are pretty impressed with the quality of photography that has come out of the Karma Drone, even though it will no longer be made after 2017. But hey, that means you'll probably get a great deal on the Karma Drone and it includes a handheld gimbal as well!
Drones that use their own on-board cameras:
1. DJI Phantom 4- This one features an obstacle sensing system and its own amazing set of flight modes. Plus the 4K video is really top-notch for drone videography.
2. DJI Mavic Pro - The Mavic Pro has really upped the game as far as image quality goes, and easy flight modes and smooth controls have really out performed the competition (looking at you, Karma).
Wait...what if you don't want to buy a drone???
We hear you. Our solution is to find a local drone pilot. Drones are everywhere nowadays and odds are there is a great drone pilot near you that is willing to collaborate on a winter project.
More than anything, we want the GoWorx community to find new ways to be creative, and that includes meeting new friends to share in that creativity. Put up an ad on a bulletin board, post on Craigslist (be careful) or ask your friends if they know anyone with a drone. If you have the shred skills, then they will probably be interesting in having an interesting subject for their next video project.
GoPro Snow Settings & Other Resources
We'll have to do a full post on the best settings for GoPro Hero Cameras, but until then, here are some great resources for dialing in the right settings for snowboarding or skiing with a GoPro:
Bring extra batteries! And keep them fully charged with either a dual charger or a portable power pack for GoPro! Cold weather is hell on electronics, so be sure to turn off your camera between runs. And we recommend keeping it in your pack or a jacket pocket when not in use to keep it out of the elements as much as possible.
Use the GoPro App. When preparing for a shot, it's always a good idea to check that you're getting the perspective that you want. The GoPro App lets you see what your GoPro sees, so you'll know you're getting the most out of your powder day shots.
Use a waterproof housing. Even though powder snow is dry, the moisture can still compromise your camera. And, even though it sucks, a sudden rain shower or spring meltdown can occur at any time throughout the ski season.
Keep water droplets off your lens. Speaking of moisture, it's always a good idea to treat your GoPro with GoSpot GoPro Lens Repellent before you head out to prevent pesky water droplets from ruining your footage.
What tips do you have for skiing or snowboarding with a GoPro? What did we miss? Let us know your tips and tricks in the comments below. And be sure to join the conversation on Instagram, Twitter and Facebook!
About GoWorx We inspire next-level content creation with our hand-picked selection of GoPro, DJI and Smartphone Gear. See how our community creates with GoWorx when you follow us on Instagram, Facebook and read up on news and tips on our GoWorx blog.
]]>
https://goworx.com/blogs/tips/holiday-guide-2017-top-12-gifts-for-gopro-smartphone2017-11-27T06:00:00-06:002017-12-13T12:33:44-06:00Top 12 Gifts for GoPro & Smartphone Users - GoWorx Holiday Gift Guide 2017Jeff Miesbauer
It's the holidays already?! Don't worry. GoWorx has you covered with our top 12 gifts for GoPro and smartphone photography in our 2017 Holiday Gift Guide.
Whether you're shopping for gifts for GoPro lovers, new GoPro Hero 5 or Hero 6 users, iPhone photographers or your favorite Instagram addict, we have assembled our 15 best gift ideas that include everything from GoPro poles, cases and filters to smartphone mounts, durable selfie sticks and even waterproof battery chargers.
]]>
It's the holidays already?! Don't worry. GoWorx has you covered with our top 12 gifts for GoPro and smartphone photography in our 2017 Holiday Gift Guide.
Whether you're shopping for gifts for GoPro lovers, new GoPro Hero 5 or Hero 6 users, iPhone photographers or your favorite Instagram addict, we have assembled our 12 best gift ideas that include everything from GoPro poles, cases and filters to smartphone mounts, durable selfie sticks and even waterproof battery chargers.
Plus, almost all of our gift ideas are compatible with the GoPro Hero 5 and brand new GoPro Hero 6 cameras, so you can be sure your gift will be a hit.
Need Stocking Stuffers? Check out our Top 7 GoPro & Smartphone Gifts Under $25. Click here or scroll down to the bottom of the page for the $25 & under collection.
Compatible with the GoPro Hero 5 and NEW GoPro Hero 6 Camera
Capture Underwater Shots with Unmatched Clarity - For anyone wanting to dive with a GoPro during snorkeling trips or SCUBA missions, filters like this are a great way to get clear footage of fish, turtles, ship wrecks or underwater drum solos. The three included filters correct the color of blue or green waters, so you end up with accurate photo and video with crisp color, not just hours of green. Plus, this kit comes complete with a waterproof (to 60m) GoPro housing, making this is the perfect gift for anyone that plans on diving or snorkeling with a GoPro Hero 5 or their brand new GoPro Hero 6.
Compatible with ALL GoPro Cameras (including Hero 5 & Hero 6)
Super Sturdy GoPro Pole to Rule Them All - Every GoPro user needs a sturdy pole for shredding the mountain, surf sessions or just for taking scenic shots with the whole family. UKPro's durable aluminum construction was built to last even your most epic wipeouts and the textured rubber grip works great with gloved or wet hands. Plus, the quick-locking knobs allow adjustment while on the move and can easily adjust this pole from 22.5 inches to the full 54-inch reach for full-body selfie shots with your GoPro. Want a floating version? Check out this UKPro floating GoPro pole.
On second thought...How about a pole that bends instead?
Try theUKPro Pivot 8 X 8 Pole - EpicPole Shots...Now with Less Pole! - A perfect gift for selfie addicts GoPro gurus and selfie addicts alike (especially when paired with ourFreeRidesmartphone mount), this solid aluminum and carbon fiber pole features an adjustable bend so you don't have to perform GoPro selfie gymnastics to remove the pole from your photos. A wrist strap and grippy rubber handle give you the security and durability known by UKPro fans around the world.
Compatible with ALL GoPro Cameras (including GoPro Hero 5 & Hero 6)
Stick Your GoPro Anywhere Without a Trace - Designed to be mounted directly to priceless handmade surfboards, the super-strong hold of the BRLS Suction Cup GoPro mount lets you achieve awesome perspectives without drilling or leaving sticky adhesives behind. BRLS quickly learned that GoPro users could mount it just about anywhere: windows, windshields, motorcycles, helmets, plane wings, kayaks...literally ANY flat (or mostly flat), smooth surface.
The creative perspectives allowed by this innovative mount go way beyond just surfers, so it is a perfect gift for the creative GoPro users that like to mix it up and make truly original content with their GoPro Hero camera.
Compatible with ALL GoPro Cameras (including GoPro Hero 5 & Hero 6)
Grab Onto the Original Design that Started it All - While designed to capture stable low-angle GoPro skate shots, our Original Handle for GoPro has shown countless uses for GoPro lovers and remains a solid gift for new GoPro owners or veteran videographers. Shoot, you could even throw a FreeRide on it and use it with your smartphone. Follow shots, static time lapse photography, adventure travel photos...the applications are nearly endless.
Compatible with ALL GoPro Cameras (including GoPro Hero 5 & Hero 6)
Secure Your Rig And Hit the Dusty Trail - Perfect for a friend or partner who's always traveling with a GoPro Hero Camera, the UKPro POV 20LT Case will give them a soft, safe and designated place to store their camera and accessories. It's tough, padded outer shell keeps the dirt out and protects against the world's most aggressive baggage handlers, and when you get to your destination you can quickly toss all of your GoPro gear into a pack and hit the beach. This GoPro case comes complete with foam cutouts for one GoPro Hero camera, wireless remote, batteries and a separate storage area underneath for chargers, cables, filters or even a GoKnuckles grip.
Compatible with GoPro Hero 3, Hero 3+ and Hero 4 Standard Housing only
Pro Tip: Most Professionals Use Filters - For the aspiring photographer looking to get the absolute best photography or videography out of their GoPro, a filter is a must. The SRP BlurFix Adapter & GoPro Filter Pack is the best deal for a collection of GoPro filters that will cover most conditions. This pack comes with a circular polarizer that cuts the glare from water, clouds, snow or windshields. The pack also includes both a 75% and a 87.5% neutral density filter to reduce the overall light and slow down shutter speeds to get smooth, artifact-free footage from fast-moving subjects (e.g. from a drone, plane, motorcycle, snowboard, etc).
Heads up, GoPro Hero 5 & Hero 6 users! Want to use your 55mm GoPro Filters for a GoPro Hero 5 and Hero 6? Check out this new H5 Series 55mm Filter Adapter from SRP that lets you do just that!
Capture Incredible Underwater & 'Split Shots' with THE Legendary GoPro Dome - KNEKT's original GoPro Dome was a marvel in its design alone. But the 'half and half' shots it allowed have brought about a revolution in GoPro dive photography. (Think: half above and half below the waterline.)
This brand new dome for the Hero 5 & Hero 6 is the next evolution of the original KSD6 Dome Port. Intricately designed and optically engineered to achieve the best underwater GoPro photos possible, this GoPro dome would be an amazing GoPro gift for scuba divers, snorkelers or really anyone that regularly takes their GoPro in the water. Best when paired with a KNEKT Trigger or Trigger Pole (see both below).
Transform Your GoPro into a High-Powered, One-Click Camera - Immaculate design and the sturdiest construction in the industry, the brand new KNEKT GPSS Trigger brings one-click operation to the GoPro Hero 5 and Hero 6. A must have tool for serious surf and dive photographers, this GoPro trigger handle is a game changer for any GoPro photographer...in or out of the water. Just lock your Hero 5 or Hero 6 into place and start shooting. For truly unparalleled dive photography, pair it with the new KSD6ss Dome Port.
Point it and Click it Anywhere - Get instant, reliable one-click performance with this GoPro trigger pole for the GoPro Hero 5 and Hero 6. Popular with GoPro wave photographers and free divers, this all metal, ocean-worthy trigger pole connects directly to your GoPro shutter button to enable point-and-shoot photography with your GoPro. An amazing gift for any GoPro user, especially water lovers, this trigger pole will give them many years of captured memories in and out of the waves. Pair it with the KSD6ss Dome Port for unreal wave and dive photography.
Sure, a decade ago the idea of a professional smartphone photographer sounded as ridiculous as a restaurant that only serves toast (wait...that's a thing now too?), but alas, today's best smartphone cameras, smartphone photo editing apps and smartphone photography accessories have transformed the standard smartphone into a powerhouse of digital creativity. Here is a rundown of our best gifts for smartphone lovers and aspiring smartphone photographers.
Unlock New Dimensions with Your Smartphone Photography - A great smartphone gadget for anyone wanting to get creative with smartphone photography or Instagram content, this combo features our popular GoWorx FreeRide Phone Mount and the MicroJib 2 GoPro pole. The MicroJib has been a favorite of ours for years because it allows you to pan and tilt your GoPro (or phone) with just a twist of your wrist. Paired with the FreeRide, which fits virtually any smartphone, you get unlimited panning and tilting for creating awesome photo and video with your smartphone.
Secure and Stabilize Your Smartphone - This GoWorx combo is great for iPhoneographers, amateur photographers or Instagram influencers who want to capture stable video and creative photography with a smartphone. The FreeRide's solid design gently but securely locks down any smartphone (up to 86.5mm wide) with its padded clamps. And when attached to our soft and grippy GoKnuckles GoPro grip, you get a stable handheld smartphone camera rig to shoot whatever adventures you encounter.
BONUS: the FreeRide smartphone mount is compatible with ANY GoPro mount or standard tripod mount, which vastly expands the creative possibilities with a smartphone.
Compatible with ANY USB device, including smartphones, GoPro Hero Cameras and even tablets.
Juice Up Your Electronics ANYWHERE - This popular USB power bank is solid gift for the constant traveler, GoPro photographer or adventurer that loves to document it all. Fully waterproof and impact resistant, this power bank will charge a smartphone up to four times (or a GoPro Hero Camera up to six times) for those extra long trips off the grid or epic action photography sessions. For all of the backup power and portable cell phone chargers out there, Outdoor Tech offers the most reliable performance that can withstand even the most adventurous users.
<--BONUS --> Stocking Stuffers: Top 7 GoPro & Smartphone Gifts Under $25
Still waiting for that holiday bonus? Looking for holiday gifts on a budget? Or do you celebrate the anti-commercial epiphany known as Festivus?
Fret not. We have you covered with these gifts for GoPro lovers and smartphone addicts that you can afford...even if all your boss sent was a membership to the Jelly of the Month Club.
Flick, Adjust & Dominate - A simple but incredibly useful improvement on the standard thumbscrew, the Schier clamp lets you quickly adjust the angle of your GoPro. Once installed, the burly metal construction secures your GoPro while skydiving, motorcycle racing or going for the world shopping cart speed record. Multiple colors available.
Keep Off Water Droplets, Keep on Shredding - Whether snorkeling, surfing, snowboarding or just capturing family vacations, water droplets can ruin GoPro footage. Apply a little GoSpot and keep water drops off your GoPro lens for good. A perfect gift for any GoPro user, this GoPro hack helps users capture and relive their best moments over and over again.
Rotate Your GoPro While Shooting - A simple but versatile GoPro gadget, this mount allows 360 degrees of rotation with its ratcheting buckle design, which clips onto any GoPro slide lock mount (included with cameras). Great for GoPro photographers who love to create truly unique angles with a GoPro, the Revolution 360 GoPro Buckle could unlock their next visual masterpiece.
The Key to Any Successful Photo Session? Organization - Sure, you could just jam all of your GoPro batteries, cables and accessories into a suitcase, but that's a great way to lose expensive gear. This simple GoPro organizer gives you a dedicated place for your GoPro and camera accessories, and is a perfect gift for GoPro-loving travel addicts and anyone that needs a little organization help.
Compatible with ANY smartphone up to 86.5mm wide Fits onto ANY 3-Pin GoPro mount OR standard 1/4-20 Tripod Mount
Unlock the Creative Potential of Your Smartphone - For any beginning smartphone photographer or Instagram professional, our best-selling FreeRide smartphone mount is a great way to get better photos with a phone camera. It attaches to any GoPro mount, unlocking a whole new world of creative possibilities while also attaching to a standard tripod. If you know someone who would love to get GoPro shots with a smartphone, this is the perfect gift!
Charge Your Smartphone or GoPro On the Go - It's simple. Everyone needs one of these. Why? Because this waterproof, impact-resistant power bank can charge a smartphone up to four times (OR charge a GoPro Hero Camera up to six times). While this burly smartphone backup charger is definitely expedition worthy, it can also save your ass when you get stranded on the side of the road with a dead cell phone. For a friend, kid or relative that always has a dead battery, this is the gift they really need this year.
Compatible with ALL GoPro Hero Cameras (including the Hero 5 & Hero 6)
Grab this GoPro Grip & Be Ready for Any Adventure - Whether you want to document all of your traveling with a GoPro or are just looking for a great GoPro handle for playing in the pool or at the beach, our signature GoKnuckles is a must have. Its lightweight, unique design fits around your fingers for a secure hold that helps stabilize your GoPro while filming any action sport or photo-worthy shenanigan. Our most popular design, we know from experience that this always a great gift for GoPro fanatics.
About GoWorx We inspire next-level content creation with our hand-picked selection of GoPro, DJI and Smartphone Gear. See how our community creates with GoWorx when you follow us on Instagram, Facebook and read up on news and tips on our GoWorx blog.
]]>
https://goworx.com/blogs/tips/goworx-2016-holiday-gift-guide-our-top-10-gopro-accessories2016-11-12T16:00:00-06:002016-12-26T17:10:48-06:00GoWorx 2016 Holiday Gift Guide: Our Top 10 GoPro & Smartphone AccessoriesJeff Miesbauer
Looking for gifts for a GoPro/smartphone photography fan? Check out our picks for the top 10 GoPro gifts and smartphone gadgets of the 2016 Holiday Season.
Holiday shopping is tough, especially for GoPro and smartphone gurus. There are literally thousands of accessories to choose from. That’s why we curated the ultimate Holiday Gift Guide for GoPro/smartphone lovers, so you can find a gift that is sure to blow their mind and boost their creativity while they document their wildest adventures.
]]>
Looking for gifts for a GoPro/smartphone photography fan? Check out our picks for the top 10 GoPro gifts and smartphone gadgets of the 2016 Holiday Season.
Holiday shopping is tough, especially for GoPro and smartphone gurus. There are literally thousands of accessories to choose from. That’s why we curated the ultimate Holiday Gift Guide for GoPro/smartphone lovers, so you can find a gift that is sure to blow their mind and boost their creativity while they document their wildest adventures.
From new GoPro poles to dive-ready GoPro accessories and smartphone photography gear, this GoPro gift guide is your secret to knocking the holiday socks off even the pickiest GoPro Gurus.
No GoPro? No Problem– With this best-selling combo you can transform your smartphone into an action camera ready to capture your every adventure. With the clamp-down security of the FreeRide and the finger-hugging GoKnuckles, your smartphone becomes an extension of your arm, opening up the world to your creative eye.
What We Love – We love seeing our fans use the GoKnuckles and FreeRide in ways we never would have dreamed. And we love that you can use the GoKnuckles with a GoPro for stable, hand-held awesomeness, or use the FreeRide in addition to your GoPro to shoot a second angle, or use the FreeRide to mount your smartphone anywhere you can mount a GoPro mount. The list goes on...
Capture the Ocean – Get the ultimate ocean photography accessories for GoPro in one package. The GP4 Trigger turns your GoPro into a one-handed, point-and-shoot camera, and paired with the game-changing KSD6 you can accurately capture the action above AND below the surface, which is a dream come true for surf photographers, divers or anyone that loves to use their GoPro in the water.
What We Love – We love the epic over-under photos possible with this combo. We also love the attention to detail in the KSD6 Dome Port, which was optically matched for your GoPro HERO camera and even increases its field of view—meaning you capture more of the tropical reef with every shot. Lastly, we love that this combo comes complete with a free bottle of GoSpot Lens Water Repellent to keep the water droplets from accumulating on the dome or your GoPro lens.
Light It Up – A burly GoPro lighting system that works above or below the waves, this package gives GoPro photographers the means to capture studio-quality photo and video regardless of light conditions. Maybe you want to record a nighttime guerrilla skate session or maybe you want to use this powerful lighting system to correct the color in your dive photography; either way, this fully waterproof 1200-lumen light and Flex Grip Video Arm is all you need to ensure you always shoot with good lighting.
What We Love – The adjustability of the Flex Grip Video Arm is impressive and accommodates almost every camera angle and light orientation imaginable. We also love the various power modes of Aqualite Pro 100° Video Light (including SOS mode) and the included waterproof case that can safely store this kit and your GoPro.
Find Your Angle and Get Wild – An adjustable GoPro pole for adventurers wanting more control over their epic video reels. This telescoping pole stands up to the abuse of mountain shenanigans, cliff dives and more while dishing out on-the-go adjustability with its Scope Lock technology and 360 Revolution Buckle, which lets you rotate your camera and dial in the perfect angle for your next moment of greatness.
What We Love – We love the awesome new camo colors as well as the dual quick-release mount that lets you quickly and securely mount your GoPro. You can even attach two GoPro cameras and film two angles simultaneously, which is rad. Choose between the Boost and 40-inch Boost Plus for an extra-wide-angle perspective of your biggest adventures.
Stable as a Table – Even though it was built for underwater GoPro photography, this two-handed tray mount works so well that all types of filmmakers are getting their hands on this GoPro trigger. The dual trigger system works for lefties or righties and the weighted, balanced design ensures smooth filming, so you can film pro-level shots at the reef or film street scenes for your next independent film.
What We Love – We love how seamlessly this pairs with the KSD6 Dome Port, continuing KNEKT’s legacy of innovative dive photography accessories. KNEKT’s sturdy design and construction should be noted as well, as this beast was built to last (like all of their gear).
Pan & Tilt Like a Pro...Even Underwater – For the future movie producer, skate legend or adventure filmmaker, the MicroJib 2 enables smooth, cinematic panning and tilting with a GoPro HERO camera. This telescoping pole is more popular than ever thanks to a redesigned internal axel and gearbox, which lets you rotate your camera with the rubber grip and add mind-bending effects to your low-budget film project.
What We Love – We love the new waterproof design that lets you capture underwater pan and tilt shots. We also love the tough design, which can withstand countless skate sessions and a few action-packed trips around the globe.
Get the Power Pack – For the tech-loving gearhead, this solar powered backpack is the perfect mix of style and science fiction. Its integrated, waterproof solar panel charges its internal battery, which can then power up your smartphone while you wander the wilds or travel to strange, possibly post-apocalyptic lands. Complete with a padded laptop sleeve, waterproof zippers and a sleek design, this backpack gives you the storage you need in a style that’s clearly from the future.
What We Love – We love that this pack’s powerful battery can charge your smartphone just as fast as your wall charger, and, of course, that you can charge your device by harnessing the power of our local star. Also, we really love that this pack comes with a free GoKnuckles so you can beef up your GoPro video skills while you travel.
Go Wide or Go Home – Grab this solid, extra-long pole for anyone on your Holiday list that wants to shoot wide-angle perspectives of their extreme exploits. This floating pole extends out to 54 inches so your GoPro can capture all of your awesome board work. It’s also long enough to squeeze all of your friends into that epic sunset shot.
What We Love – We love that this pole floats, making life easy for surfers looking to capture their scenic wave riding. The bomber aluminum design also gets high marks for durability, making it the top choice for many extreme athletes and adventure-loving filmmakers.
Click It, Spin It, Shoot It – The perfect gift for the action junky that’s perpetually stepping up their game (and the GoPro videos that go with it). With a click of its lightning-fast trigger, your GoPro (or smartphone) rotates 180-degrees instantly, switching between selfie and forward modes fast enough catch the face you made right before that massive wipeout.
What We Love – Other than that sweet, sweet swivel, we love that you can just as easily mount a GoPro, smartphone or any other camera to its standard ¼-20 tripod mount. We also love that you can operate this rotating selfie stick underwater and catch all your fishy friends down at the reef.
Stick It & Rip It – Designed as a surfboard mount that doesn’t ruin your board, this powerful suction cup mount lets you mount your GoPro to any flat (or nearly flat) surface. Bumpers, windows, boats, robots—you name it and this sturdy triple suction cup will stick to it. Aside from the obvious surf flicks, this versatile mount works great for action movie sequences, travel vlogs, promotional videos and countless other applications.
What We Love – Even with its extreme hold on wet or dry surfaces, this mount’s clever cup design still makes it easy to remove and adjust while you’re waiting for the next luscious set of waves to roll in.
About GoWorx We inspire next-level content creation with our hand-picked selection of GoPro, DJI and Smartphone Gear. See how our community creates with GoWorx when you follow us on Instagram, Facebook and read up on news and tips on our GoWorx blog.
]]>
https://goworx.com/blogs/tips/121011139-knekt-gopro-accessories-buyers-guide2016-05-05T17:08:00-05:002016-05-05T17:10:43-05:00KNEKT GoPro Accessories Buyer's GuideJeff Miesbauer
In the world of GoPro accessories, KNEKT has set itself apart with truly innovative designs that have revolutionized the surf and underwater photography game. Whether you want to snap your buddy dropping into a frothy wave or document your new fishy friends down at the reef, KNEKT has the tools to transform your GoPro HERO camera into a one-button, wave-ready camera capable of truly stunning imagery.
We rounded up this KNEKT Buyers Guide to help you get your hands on the ultimate GoPro accessory for your undersea missions, overland adventures and everything in between.
]]>
In the world of GoPro accessories, KNEKT has set itself apart with truly innovative designs that have revolutionized the surf and underwater photography game. Whether you want to snap your buddy dropping into a frothy wave or document your new fishy friends down at the reef, KNEKT has the tools to transform your GoPro HERO camera into a one-button, wave-ready camera capable of truly stunning imagery.
We rounded up this KNEKT Buyers Guide to help you get your hands on the ultimate GoPro accessory for your undersea missions, overland adventures and everything in between.
Why KNEKT?
KNEKT first got our attention with their ingenious designs, which have enabled surf photographers and ocean lovers to use their GoPro HERO cameras in ways not previously possible…at least not without a few thousand dollars worth of camera gear. But what really won us over was the impressive quality and durability of their products, which are proof of both good design and proud craftsmanship.
All KNEKT products are designed and manufactured in the USA by skilled machinists using the best possible materials. They use military-grade aluminum and stainless steel where possible, and are constantly thinking of ways to improve their products and develop new designs to complement your creativity.
These are not cheap, one-time use selfie sticks; these are tried and true tools that can stand up to long photo sessions in rough waves and rock-lined reefs. Photographers, GoPro Athletes and GoWorx Ambassadors all over the world are using KNEKT to capture spectacular content. We can’t recommend KNEKT products enough, so we decided to write a guide to why we think they’ll blow your mind too…
The GPLT Trigger turns your GoPro camera into a stable, one-click point-and-shoot camera capable of documenting the rowdiest surf sessions, dives or any type of action or adventure. Its stainless steel trigger mechanism engages your GoPro’s shutter button, so you can instantly capture the action as it happens in realtime. This takes the guesswork out of your surf photography or really any time you want to use your GoPro as a point-and-shoot camera. Plus, its one-handed operation lets you use your other hand to swim around the waves, stay balanced on your board or do whatever you need to do to focus on the shot.
Why You’ll Dig It…
Of course you’ll dig the one-click photo capture, but what you’ll really like is the confidence you’ll get from the spring-loaded return that lets you know you got the shot…every time. In addition, the GPLT’s durable, saltwater-resistant materials ensure that your trigger will last for years of heavy use, while its stainless steel, military-grade aluminum and machined polymer construction only weigh 5.5 ounces to keep you shooting comfortably for hours.
Its open-cage design enables easy access to your GoPro buttons and LCD screen, while it also lets you easily attach filters and other housing accessories to enhance your underwater photography. Speaking of which, the GPLT pairs perfectly with the KNEKT Dome Port KSD6, enabling incredible over-under photography that shows both underwater and above water in the same photograph.
Last but not least, you’ll probably dig the price at only $99.99, which is the most accessible Trigger in the KNEKT lineup. So if you’re looking for one-click photo capture, the GPLT is the easiest on your wallet.
NOTE: The GPLT is compatible with the GoPro HERO 3, HERO3+, HERO4, Blackout and Dive housings. However, the GPLT is NOT compatible with the GoPro Battery or LCD Touch BacPac. If you want to use those GoPro accessories, check out the GP4 Trigger below.
Add comfortable security to your GoPro and GPLT Trigger (or any KNEKT Trigger or pole) when you rig it up with the KWT Wrist Tether. If you’re paddling out into the surf with your GoPro, attaching yourself to your rig is just common sense. The KWT’s adjustable hook-and-loop wrist closure works with all sizes and it features double padding to prevent chafing in salt water. Its adjustable length, hidden key pocket and stainless steel swivel ring work together to provide a solid tether that will secure just about any pole, grip, handle or GoPro accessory on the market.
The GP4 Trigger delivers the same ridiculously easy one-click photo capture but features a full metal cage to protect your GoPro during the roughest wave photo sessions. The GP4 excels in surf photography and any type of ocean photography where you’re putting yourself in the path of waves, exploring reefs or greeting curious sea life. It will also hold up to your high-speed wakeboard and wake surf shenanigans as well as protect your GoPro HERO camera when you toss it in your camera bag and travel for months at a time.
Why You’ll Dig it…
You’ll dig the GP4 Trigger because of the way it feels in your hand. Its superior design was developed in response to customer feedback and is the latest in a line of awesome triggers. You’ll instantly feel that care and craftsmanship in this durable trigger. As for specifics, there’s the extra GoPro protection provided by the military-grade aluminum cage and the one-click confidence of the all-metal trigger mechanism, which enables easy, one-handed operation. The frame allows full access to your GoPro’s buttons and LCD screen, and it's also compatible with a GoPro Battery, LCD Touch BacPac and filters.
With ¼-20 thread ports on the frame, you can attach lights, microphones, monitors or even second camera mounts to beef up your camera rig. And of course, the GP4 Trigger pairs perfectly with the incredible KNEKT Dome Port KSD6 to further enhance your underwater photography.
NOTE: The GP4 is compatible with the GoPro HERO3+ and HERO4.
Word on The Street
“Amazing Trigger. Very easy to setup and maintain. Simple to use and very comfortable when taking pictures under water. Works well with the 6 inch Dome.” - Nina McIntosh, GoWorx Ambassador, @alohaninalove
Like all of their products, KNEKT designed the KTP18 Trigger Pole for use in and underneath the waves. But in reality, the KTP18 dishes out solid GoPro pole shots anywhere thanks to its reliable one-click trigger mechanism that was incorporated into the 18-inch aluminum pole. By anywhere we mean snowboarding, surfing, skating, exploring ancient Incan ruins or just playing around in the backyard.
Unlike the Triggers above (that are primarily for shooting forward subjects like a traditional camera), the KTP18 lets you capture yourself getting in on the action. Its stupid-simple operation lets you do that easier than ever because all you need is one hand to click your GoPro shutter or video on/off button while the rest of you can focus on dropping in and sticking the landing.
Why You’ll Dig it…
The simplicity KNEKT brings to this GoPro pole will blow your mind and enable you to capture mind-blowing photo and video of any kind of session. Truly one of a kind, this painstakingly designed trigger pole gives you instant, one-click content capture from an 18-inch pole. Its reliable durability is also a huge plus that’ll pay off over the years thanks to its JAGWIRE performance stainless steel cable and its military-grade aluminum and stainless steel construction. Plus, it’s salt-water, dust and mud resistant so you can take it anywhere, and its sturdy camera mount design lets you tilt your GoPro 180-degrees and dial in a range of angles. Lastly, at less than a half-pound, you can keep shooting for hours without wearing out your arm.
The KNEKT KTP18 Trigger Pole also pairs perfectly with the KNEKT Dome Port KSD6. NOTE: The KTP18 Trigger Pole is compatible with the GoPro HERO3+ and HERO4 housings only.
The floating, super-sturdy FPSH Handle enables easy photo and video capture of your water-based adventures. Its fully sealed, 12-inch tube provides floatation with your GoPro in case you drop it in the waves while its pole design and tilt-able mount allow high-action selfies as well as standard forward-facing shots. With the ability to expand its length with an optional Pole Section FPS1 (or two), you can get the desired length for capturing any type of aquatic adventure.
Why You’ll Dig it…
You’ll immediately dig the FPSH Handle’s simple, sturdy design, which can handle the roughest days of wave riding or surf photography. Plus, its grippy co-polymer handle provides video stability and confidence with an included tether for extra security. And since the sealed pole section design floats, you can feel comfortable tossing this rig to a friend to film your next wave. Sure it’s simple, but as usual, KNEKT designed the FPSH Handle to be the ONE floating GoPro pole you’ll ever need.
Screw on one or two of these pole sections to your FPSH Handle to extend it by 12 inches (or 24 inches, respectively) and expand the field of view of your GoPro pole shots. Built with saltwater-resistant aluminum and stainless steel, these sections are strong enough to withstand the biggest breaks while light enough (5.6 ounces) to not weigh you down while swimming.
KNEKT’s KSD6 Dome Port turns your GoPro into an incredibly simple and effective underwater camera for your surf sessions, snorkeling missions and creative fishing films. It moves the waterline a couple inches away from your GoPro’s lens, which removes distortion and eliminates focus issues when snapping over-under photography (split shots, 50-50 photos, etc.). These are the insanely awesome photos that are half above water and half below, and this dome lets you dial in crystal clear snaps of both worlds simultaneously.
It’s meticulously engineered dome shape was developed to perfectly match your GoPro’s lens optics, and KNEKT did such a good job that the KSD6 Dome Port actually increases your cameras field of view by 30 percent...which lets you capture more with every shot. It also improves minimal focal distance by 50 percent to enhance your capture of close and faraway subjects. So attaching the KSD6 Dome Port will improve your GoPro’s ability to capture your adventure whether its underwater, above water or getting the best of both.
Why You’ll Dig it…
Stellar optics and unreal images aside, you’ll dig the KSD6 Dome Port because it’s so easy to install and use with your GoPro HERO camera. Its backing plate enables one-screw, tool-free installation, and once attached you still have access to your shutter button and a view of your LCD screen. Plus, a waterline marker on the back of the dome lets you get perfectly symmetrical over-under photos.
Lastly, you’ll dig how well the KSD6 Dome Port pairs with the KNEKT Trigger GP4, Trigger GPLT and KTP18 Trigger Pole, turning your GoPro into a one-click capture machine fit for surf photography, underwater photography or any water-based adventure. We also hear this dome pairs well with our GoWorx GoKnuckles…
Word on the Street:
“The best thing ever! Two words.... GAME CHANGER!! I love this dome!! I suggest you get one ASAP!! This product has taken my photos to the next next level!! It's great for capturing awesomeness both under and above the water!! KNEKT is an amazing company with so many products!! Go check them out!!” - @_brandonpopa_
“The Dome is perfect! This Dome has taken my photography to the next level. It's diversity allows my photo to have the best of both worlds. I love how easy you can install it on the GP4 trigger system and it's easy to access the button controls while the GoPro is on. Maintenance is easy and all you need to do to protect it is to have the Dome Port Cover (KDC6). - Nina McIntosh
Not to be forgotten, this Dome Port Cover is the easiest way to keep your Dome Port in primo condition and prevent scratches from drops and rough journeys in your camera bag. Just stretch the cushy neoprene over your dome and cinch it up tight. The cover also includes a foam plug to seal off the Dome’s GoPro window and keep out dust and sand when not in use.
Still need helping finding the ultimate GoPro accessory for your adventures? Head on over to GoWorx.com and check out our top-shelf collection of GoPro, Drone and Mobile Gear guaranteed to take your content to the next level!
How do you use your KNEKT gear? Share with us below or tag us @goworx on Instagram.
]]>
https://goworx.com/blogs/tips/119054979-ultimate-gopro-pole-buyers-guide2016-05-02T13:57:00-05:002016-06-30T15:46:34-05:00Ultimate GoPro Pole Buyer's GuideJeff MiesbauerThere are a lot of great GoPro Poles out there, so we created this GoPro Pole Buyer's Guide to help you navigate our always expanding selection of the world's best extension poles. We broke it down into three categories based on simplicity and features: Standard and Sturdy, Feature Packed, and Floating Poles, as well as a few complimentary products we think you'll love. Dive in and let us help you find the perfect GoPro pole...
]]>
Capturing yourself in those amazing moments is always easier with a trusty GoPro pole by your side.
There are a lot of great GoPro Poles out there, so we created this GoPro Pole Buyer's Guide to help you navigate our always expanding selection of the world's best extension poles. We broke it down into three categories based on simplicity and features: Standard and Sturdy, Feature Packed, and Floating Poles, as well as a few complimentary products we think you'll love. Dive in and let us help you find the perfect GoPro pole for your adventure, whether you're catching swells in Maui, shredding pow in Squaw Valley, or exploring the urban jungle...
Category 1: Standard and Sturdy These GoPro poles do exactly what they are supposed to do: free you up to take awesome footage with your GoPro. Let's take a look!
Rugged and Comfy: The Telescoping GoScope Boost GoPro Extension Pole is a solid, easy to use, sleek piece of hardware that lets you mount up to two GoPro HERO cameras while withstanding heavy snow, deep waters and everything in between. Extending up to 26", the aluminum body is crash- and adventure-proof, and the trusty wrist strap and grippy handle texture have us sold.
What We Love: This thing feels like a beast, is lightweight and has some cool features like a patented quick release mount and the capability to mount two cameras. Catching simultaneous forward-facing and self-facing views really lets you add new dynamics to your edits.
Catch Every Angle: The UKPro HD series is as burly as it is simple...in the best way possible. The GoPro attachment point swivels 360 degrees, letting you dial in the absolute perfect shot. Extending this pole to its full 38 inches (or 54 inches depending on model) is quick and easy, so you can adjust your perspective in the middle of your pow run and even while still recording.
What We Love: It might look like you are wielding a sword, but the rad results speak for themselves. We dig the brightly colored handle on this GoPro pole because it looks cool and provides a comfortable, confident grip in or out of water. The UKPro HD series is easy to use, salt-water ready and will stand up to years of abuse while capturing your wildest moments.
Get the Angles You Need | 38 inch $49.99 | 54 inch $59.99
Category 2: Feature Packed These GoPro poles twist, pan and click. Take a look at the innovative pole designs on GoWorx.com
Look Ma, One Hand! Two full years in design, the expertly crafted KNEKT KTP18 is the world's first true one-handed GoPro trigger pole. The KTP18 keeps with KNEKT's trend of sleek, beautiful and highly durable products, and it frees you up to take expert shots while not compromising anything. All you have to do is pull the trigger. This pole is simply a masterpiece and should be on the radar for any amateur, semi-professional and professional extreme sports junkies.
What We Love: The KTP18 Trigger Pole is a work of art. Expertly designed and truly innovative, this one-click trigger GoPro pole lets you focus on your ride while the camera captures your raddest moments.
Jib for Jibbing: Ever wanted a buttery-smooth pan to capture a buddy's epic moment on the pipe? Ever felt the need to pull off a perfect camera tilt to tie together an edit? The MicroJib has your back. A truly original product, the MicroJib lets you tilt and pan your GoPro with extreme ease. This pole was a successful Kickstarter story and is rightfully making its way into the gear arsenals of content creators all over the planet.
What We Love: At GoWorx we value innovative designs that bring new ideas to the table. The MicroJib hits on all points--there really isn't anything else like it on the market.
Surf Ready: Above we mentioned out love for the UKPro HD. The HDF is no different. Dropping in on a massive barrel? Diving down and hanging out with sea turtles? Quickly frame a shot for the next wave with distinct UKPro features like the rotating GoPro mount. The floatation device is well-built and looks great. Best part is, you don't have to worry about losing your pole.
What We Love: The UKPro HDF Floating GoPro Pole feels great in the hand and we love the look!
Hawaiian Bred Awesomeness: The KNEKT Handle FPSH brings together the insanely excellent build quality of KNEKT and extreme utility. Charge the depths with no fear, this floating pole has got you covered. BONUS: Want to extend it?Check out the floating KENKT Pole Section FPS1 at an easy $24.99
What We Love: Sleek modern aesthetic, lightweight but durable, comfortable to hold and a breeze to use, what's not to love?
Complimentary Gear Since we have so much awesome gear in the shop, we thought we could take a look at some complimentary products we recommend you pair with any of the GoPro Poles above.
Take Your Mobile Photography to the Next Level: Yes... we built it. But that doesn't stop the FreeRide Phone Mount from being a world-class accessory that will let you easily connect your phone to your favorite GoPro Pole! The FreeRide Phone Mount works with any sized phone even with the case on, and reviewers have hailed it as the best on the market.
What We Love: It's our baby, but from an objective standpoint the fact that the FreeRide connects to both GoPro mounts and standard tripods is a game-changing feature.
Get a Grip: Just imagine it, you are shredding some glassy swells when a mermaid catches your eye. The moment of distraction leads you to forget about the massive marble slab coming your way. You get thrashed, down for 45 seconds... the mermaid is unimpressed. The worst part? You lost your GoPro Pole! This common scenario will never happen again with the KNEKT Wrist Tether. This double padded and super comfortable tether can attach to most GoPro Poles and really any other accessory or device you use to capture the moment.
What We Love: It feels good, is easy to attach, and should be a part of any gear arsenal.
What GoPro pole do you use to capture your adventures? Share below or tag @goworx on Instagram with your raddest GoPro pole perspectives...
]]>
https://goworx.com/blogs/tips/119543363-7-secrets-to-becoming-an-ambassador-for-brands-like-gopro2016-04-18T19:36:00-05:002016-04-22T12:44:31-05:007 Secrets to Becoming an Ambassador for Brands Like GoProJeff MiesbauerDo you want to learn how to become an ambassador for today’s top brands and jumpstart your career in photography, videography or just awesome action and adventure content?
We recently chatted with a few professional content creators and asked how they established their relationships with GoPro and other top brands like LifeProof and Prana. Their answers were just too good not to share. So we took their advice and assembled it into 7 easy tips that will give you the tools to create better content, build brand relationships and acquire sponsors (...and hey, maybe even score some free gear!)
]]>
Do you want to learn how to become an ambassador for today’s top brands and jumpstart your career in photography, videography or just awesome action and adventure content?
We recently chatted with a few professional content creators and asked how they established their relationships with GoPro and other top brands like LifeProof and Prana. Their answers were just too good not to share. So we took their advice and assembled it into 7 easy tips that will give you the tools to create better content, build brand relationships and acquire sponsors (...and hey, maybe even score some free gear!)
.....
How Did the Pros Do It?
So you’ve seen athletes, photographers and content creators become ambassadors for your favorite brands or become members of the GoPro family and now you want to get in on that sweet action. Well, how did they do it? We asked photographer and filmmaker Kyle Ohlson how he became a part of the GoPro Family. Here’s his story:
“I always posted [GoPro] videos and photos to GoPro’s Facebook page to show them what I used their camera for and how fun and easy their camera is to use. After some time the one girl who ran all of their social media at the time (Pilar Woodman) sent me a message saying they like the content I was posting and she sent me a HERO2 a couple weeks after it was released. I was super stoked and started to shoot all sorts of random stuff with it and always posted it to their Facebook wall.
Ever since then my relationship with GoPro keeps growing. I am so lucky to be apart of the epic GoPro family. It's been crazy to think how far they have come and what they have done since 2010. I was their 23rd follower on Instagram and now they have over 8 million followers.”
That’s it? Really? Well, in the years since Kyle became a part of the GoPro family in 2010, the company has grown exponentially. Today, you can’t just post a few videos and expect a free GoPro. But fortunately, for most of the smaller, up-and-coming brands, the basic selection process hasn’t changed:
Create killer content
Get a brand/company to notice it
Join brand membership/ambassador program
For GoPro and other major brands, #2 has become more challenging. That’s why this guide focuses on building relationships with more accessible brands that help improve your content, expand your audience and pave the way to your bigger brand sponsorship goals. But we’re getting ahead of ourselves. First and foremost, you absolutely MUST…
1. Create Killer Content
This is the big one. If you want to get recognized for your photo and video, the first step is to make sure your content is really top notch. We’re not talking about cool…we’re talking about imagery that stirs people to their core. Here are a few pointers to help you tighten up your content:
Find Your Niche…Whatever you do, be you. Be authentic. No one in the world sees things quite like you do. No one else in the world can create what you are capable of creating. “Be unique, have consistency, only create and share quality content. Ask yourself, would YOU yourself want to watch/look at something like this...” – Atom the Pug (@atomthepug)
If your niche isn’t immediately obvious, take Adventurer Calvin Young’s advice and spend some time researching and trying different types of content. Then stick with what works:
“For any amateur content creator, what I learned from my journey is that it’s okay to continue trying all types of content as long as you get an opportunity to identify which content your audience likes the best. […] It’s pretty easy, all you need to do is to research which keywords that were searched the most, then go with it. Not only that, you can open yourself to hear what your audience wants, and make some adjustments.” – Calvin Young (@calvinexplores)
Or you could be like GoWorx Ambassador Tim Mathews (@timthetoothninja) and take a more strategic approach:
“I followed every GoPro account that I could to see what people were doing with their GoPros and to see how I could come up with my own original GoPro content. I think I was able to do that with the unusual combination of dogs, Alaska, and the Northern Lights.” – Tim Mathews
Brush Up on Your Photography Skills…Take a class or at least familiarize yourself with the basic elements of composition. Educate yourself on color theory, lighting techniques and advanced camera settings like shutter speed, ISO and white balance, which can all vastly expand your range as a photographer. “I truly do look at the quality of the picture to see if it’s going to be good enough, i.e. lighting, color, framing, quality of the content.” – Tim Mathews
In addition to stepping up your technical skills, experiment with new angles and perspectives at every opportunity. A trusty toolkit of mounts, poles, handles and GoPro accessories will further expand your creativity, encouraging never-before-seen angles and imagery that will truly captivate your audience. To find more interesting ways of capturing your world, check out our carefully curated collection of GoPro, Drone and Mobile Gear on GoWorx. All of our gear was designed or handpicked to stoke your creativity and inspire killer content.
These tips also apply to videography, where you can incorporate high-speed (or slow-motion) action, multiple perspectives, never-before-seen angles and countless other elements to create your own style. “…I only think ‘how can I make what I’m about to film different than anyway I’ve seen this captured before’. And with that mindset I usually can think of some little things to make what I’m about to capture stand out. I just try to focus on doing it in a way that’s never been seen before.” – Kyle Ohlson
Tell a Story…Whether it’s implied within your photo/video or your personal story as an aspiring photographer, your audience craves something deeper within your content. That’s what keeps them coming back and following your adventures…
“What [Brands/Companies] want is to find people with an interesting story because it’s what the most customers want to hear. They need to be empowered. They need to be inspired. I always share the story about myself as a deaf traveler who continues traveling all over the world, defeating numerous oppressions, breaking barriers, and making the best out of my trip. I show them that I’m more than just a traveler. It inspires them. It’s what they want the most.” – Calvin Young
But don’t forget to have fun with it…
“Lastly but MOST importantly…you have to tell a story within your content, whether it be a dog chasing a stick to [a parrot] cooking dinner.” – Atom the Pug
The More You Get, The More You Get…When you’re gathering the raw materials for your epic reels and Instagram page, the more you have to work with when you get to the edit stage, the greater the odds you’ll have a few bangers that really impress your audience.
“Going through all the 2,000 images you shoot on a pow day is a large part of selecting the best shareworthy media. It takes some time, but having a good workflow can really save time when it comes to finding the best picture out of the 2,000 you shot.” – Kyle Ohlson
Edit for Success…Last but not least, editing is a vital step to creating incredible content, whether you’re distilling down hours of GoPro footage or brushing up the color in your photos. Get your hands on whatever editing software you can find to put the final touches on your photo or footage. Editing is an art in itself, and the more you master it, the more you will be able to produce stunning content.
2. Live the Brand
If you’re looking to become a brand ambassador, whether for GoPro, GoWorx or Prana, you’d better be a devoted advocate for that brand. BUY their gear, refer and educate your social media followers on the brand and use your content to show that you’re living the brand’s mission.
At the same time, be on the lookout for brands that share similar values and vibes as your content. You might be surprised with what you find and how willing they are to collaborate.
“Prana loves the fact I’ve been traveling all over the world and sharing nature photos constantly. It’s fitting the message they’re sending to their customers. It’s about your work and what you do. Don’t bother to contact any brand that does not fit what you do because they’ll decline you flatly.” – Calvin Young
3. Know Thy Gear
If you want to create killer content, it is absolutely essential to know your gear inside and out; that includes your DSLR camera, drone, smartphone, GoPro HERO camera or any number of accessories you use to enhance your content capture. For the experts, gear knowledge begins before a purchase with hours of research to find the right camera gear or accessory.
“It's incredibly important to fully understand the gear you are buying to use for productions. […] I recommend researching, reading lots of reviews and also watching review videos, before you purchase the product. And, once you have the product in hand, test it out several times before you go out to film and rely on the product to help you capture epic content.” – Kyle Ohlson
We have done our best to make that gear research process easier for you. At GoWorx.com, our detailed product pages, customer reviews, buyer’s guides and gear experts can help you find what you need to take your content to the next level. Besides, we hand selected the very best GoPro, Drone and Mobile Gear and stand behind it with our 100% Gear Guarantee, so you don’t have to sift through thousands of cheap knock-offs to find what you want. And if you have questions about how to use a product (whether you buy it or not), we’ll be stoked to give you the best gear advice possible. In other words, in your journey to obtaining ninja-level gear knowledge, GoWorx is your dojo.
Also mission critical: a thorough knowledge of the gear and brand you wish to represent. If you want to become an ambassador for GoPro, KNEKT, GoWorx or (insert brand name)...you better know all there is to know about their gear:
“It’s super important to understand and know all that you possibly could know about the brands that intrigue you. In Atom's case, we’ve learned all that we know now simply from truly being in love with the brand…if you will. Watching each and every single tutorial, GoPro edit and article on the face of the Earth has definitely played a HUGE roll in what we know today. Not to mention interacting with other users within the community. I must admit, I did learn TONS from my good friend Mitch Bergsma, the GoPro God!” – Atom the Pug
4. Start Small
Like we touched on in the beginning, becoming an ambassador for GoPro (or any major brand) probably won’t be as easy for you as it was for Kyle Ohlson. It is certainly still possible, and GoPro is still actively seeking out content creators, adding a majority of their 475 Ambassadors in 2015 alone. But with millions of GoPro users in the world, it’ll serve you best to have a strategy with greater odds of success. There are many accessible ambassador opportunities for photographers and filmmakers, you just have to cast a wider net in order to find them. Our advice: seek out up-and-coming brands that are on the hunt for like-minded, up-and-coming content creators like yourself.
In case you didn’t know, GoWorx is an up-and-coming brand that collaborates with all types of content creators around the world...And our brand-newLifetime Membership Program makes that collaboration easier than ever. All you do is sign up, pay a small one-time fee and you are set for life...
The GoWorx Lifetime Membership gives you:
Welcome Kit including a GoWorx T-Shirt, stickers and a free gift.
15% off all GoWorx brand products for life, so you can easily get your hands on the tools you need to create killer content.
Invitation to our Facebook Member’s Lounge where you can instantly expand your audience and even get featured on our social media channels and GoWorx.com. It also provides a unique opportunity to collaborate with and learn from other content creators like yourself.
[BONUS] You’ll get an invitation to the HookUp Rewards Program and automatic entry into every single GoWorx Giveaway...for LIFE!
Exclusive Members-Only Access to products and deals via email.
Most of all, the GoWorx Membership is an easy way for you to get involved with a growing brand. And it’s not a huge jump to go from a devoted member to a full-fledged GoWorx Ambassador.
Starting with up-and-coming brands like GoWorx is a great way to build up your resume, dial in your content and expand your audience before you go after the big dogs. If you can prove you are capable of maintaining a relationship with a smaller brand or company, larger brands will see that you’re serious and you’ll have a better shot at landing a spot as an ambassador for GoPro or (insert dream brand).
The biggest thing to remember is that this is a process. Good things take time, and brand relationships are no different. Be patient and stay true to your creative vision. For most people, working up to a GoPro Ambassador or family member takes years, so buckle down and get to work.
“If your content stands out it will be rewarded—trust us. This all doesn’t happen overnight. In Atom the Pug's case, we had been filming and making crazy videos using GoPros ever since they released the "Hero," GoPro's first capture device […] It wasn’t until last year that Atom caught a few eyes…once he started driving vehicles and getting himself well-known worldwide.” – Atom the Pug
5. Engage in Social Media
The keyword here is engage. I think we all know the importance of social media, but you only get out of it what you put in. Reply to all comments, research and use effective hashtags, tag gear brands and, most importantly, be professional. Treat it like a business, because if you’re successful at it, it will be your job.
“Social media is the biggest tool for sure. Sometimes it can be tricky to get a brand to notice you and what you're doing, but providing links to your social media accounts can really help you out by letting them see what you do or if you are consistently out shooting or shredding enough that they would like you to use their product in your content.” – Kyle Ohlson
“Find and set a goal for what you want to achieve with your social media outlet. […] Try to get your photos featured by other accounts. Usually this is done by tagging and targeting accounts that feature specific [types of] photos. The more exposure your photos have the more people will see and likely follow. Interaction is key. Comment back to your followers as much as possible. Interact with the other sites that you would like to get featured on. Like and interact with accounts that you aren’t even necessarily following.” – Tim Mathews
6. Build Your Audience
Everything we’ve covered so far will prepare you to build a far-reaching audience with your social media channels. Some key points to remember when building your audience: be unique with your content, continuously engage with your community (while seeking out new followers and collaborations) and get creative at any and every opportunity. Most importantly, remember to focus your main energy on making scroll-stopping content. That’s what it’s all about...
“It’s not as easy as some people think it is. I would say don’t ever focus on building a large audience on social media, it'll naturally come if you just go out there and film/produce the type of content you enjoy sharing. Try to focus on sharing things that haven’t been seen before, or create something in hope to inspire others.” – Kyle Ohlson
7. [Bonus] Build a Website
This one is a bonus, but it’s damn-near mandatory for photographers…or really anyone who wants their portfolio to “pop” with big brands. It’s so easy to create an online portfolio with Wix, Weebly, Squarespace, Pagecloud or any free website builder. Everyone should be doing it. With a website, you can post hi-res photos, your resume, links to all of your social media channels and have all of your media in one place, which makes it that much easier for brand scouts to see your potential. Plus, using your name as a domain name gives your portfolio a bit more professional credibility, which could be the extra bump you need to make the cut for your dream brand.
Now Go Get After It!
We hope this guide gives you the know-how and motivation to get out there and chase down your wildest creative ambitions. For us, that’s the whole point...to inspire the world to get out there and capture life lived at its fullest. Helping our community grow their skills in photography and filmmaking is our MO, and we opened the GoWorx Store to further that mission by providing innovative GoPro, Drone and Mobile Gear that is sure to take your content to the next level.
Kyle is a GoPro Brand/Photo Ambassador and an immensely talented photographer and filmmaker from Bend, OR. He has been in love with taking photos since he received his first camera in middle school. Since then he has been upgrading his gear, nailing photo gigs and turning heads in the industry with his compelling compositions and rad mountain edits.
Tim is many things: dog lover, filmmaker, photographer, dentist…but he won us over with his breathtaking GoPro time-lapse shots of the Northern Lights. His home in Alaska gives him a front row seat to the atmospheric spectacle, but his ability to keep it fresh with fun photos of his pups and general Alaska awesomeness keeps his followers coming back.
Atom the Pug is a member of the GoPro Family and is the only pug we know that can drive a car. He first hit the scene in February 2015 and in that short time has blown up Facebook and Instagram thanks to furry appearances on CNN, Fortafy and The Chive. Atom the Pug partners with Feiyu Tech Gimbals, Drone World, Snake River Prototyping (camera filters), GoScope and a host of other brands.
Calvin is a photographer, filmmaker, adventurer but above all a traveler. For the past few years he has criss-crossed the globe, shooting incredible adventure footage and empowering the deaf community. He’ll tell you that anyone can travel, learn about themselves and be as adventurous as they want to be. Aside from his awesome photo and (sometimes hilarious) video, he has published some great travel resources and tips on his website. If you ever need to know the best places to bungee jump in New Zealand, Calvin is your man.
]]>
https://goworx.com/blogs/tips/117454659-drone-buyers-guide-3dr-solo-vs-dji-phantom-32016-04-06T10:39:00-05:002016-09-09T18:14:08-05:00Drone Buyers Guide: 3DR Solo vs. DJI Phantom 3Jeff Miesbauer
These days, aspiring aerial photographers have hundreds of camera-equipped drones to choose from, but when considering reliability, usability, image quality and value, the 3DR Solo and DJI Phantom 3 emerge as the top choices. Of these two, which one would be best for you? Well, that all depends what you want to do with your drone. No matter your motivation, this drone buyers guide will help you decide which of these two amazing drones can help you reach your loftiest photography dreams.
]]>
These days, aspiring aerial photographers have hundreds of camera-equipped drones to choose from, but when considering reliability, usability, image quality and value, the 3DR Solo and DJI Phantom 3 emerge as the top choices. Of these two, which one would be best for you? Well, that all depends what you want to do with your drone. No matter your motivation, this drone buyers guide will help you decide which of these two amazing drones can help you reach your loftiest photography dreams.
3DR Solo & DJI Phantom 3: A Side-by-Side Feature Comparison
The 3DR Solo and DJI Phantom 3 Professional* can both deliver Ultra-HD 4K video, 12 megapixel photos and an insanely fun flying experience at a price that doesn't require selling your non-essential organs. Despite their awesome overlapping features, the differences between the two are great. Understanding the separate features of both will help you get an idea for which drone fits your intended use and personal preferences. Let’s break it down feature by feature so you can determine whether the Solo or Phantom 3 is the drone you’re looking for…
*Note: In this guide we are comparing the 3DR Solo and the DJI Phantom 3 Professional. All references to the Phantom 3 are references to the Phantom 3 Professional unless otherwise noted.
Aircraft Design
Solo: Stealthy and Open for Upgrades
Many are sold on the black, stealthy look of the Solo. Sure, the black looks cool, but its dark color also lets it stand out against white clouds, helping pilots or spotters keep a visual. With its boxy, angular shape, the Solo is built more for utility, like a flying truck…not to say that trucks aren’t still super cool.
Perhaps the most significant difference in the design (and the Solo in general) is 3DR’s efforts to make the Solo an open platform. Included accessory attachment points and a removable gimbal allow gimbal upgrades, third-party hardware and even advanced imaging systems, parachutes and other technology that’s yet to be invented. That’s why 3DR has initiated the “Made for Solo” development program to encourage developers to create new hardware and software for the Solo, which also allows direct access to its main flight computer. Keeping with the open approach, 3DR made the Solo’s motor pods removable so you can upgrade them and add even more power to your Solo.
Phantom 3: That Familiar Phantom Look
A first look at the Phantom 3 reveals its sleek, smooth lines and bright, white housing covering the entire quadcopter design. To some, the symmetrical footprint of the Phantom 3 may be more visually appealing, and its resemblance to DJI’s popular Phantom predecessors might explain why some drone pilots gravitate towards the new Phantom.
The landing gear of the Phantom 3 is also a bit different from the Solo, providing a little extra clearance between the camera and the ground during takeoff and landing. The Phantom’s crossbars between the landing legs work well as handles while calibrating the compass before flights, and some pilots use them for hand launching and catching instead of landing their Phantom on the ground. Please do so at your own risk; those props can seriously cut you.
Flight Features:
Solo: More Power, Slightly Less Flight Time
With twin 1GHz Linux flight computers, one located in the aircraft and one in the controller, the Solo splits the computing power and provides a powerful, precise flying experience. Its system of GPS, gyros and accelerometers feed flight data to a Pixhawk 2 Autopilot System, resulting in smooth flight while filming and rock-solid hovering for taking stills despite breezy conditions. Plus, a little extra weight in the Solo further improves its steady performance in the wind.
The Solo was the first drone to offer fully automated flight modes specifically engineered for aerial filmmaking. These Smart Shot modes are surprisingly effective and include Cablecam, Orbit, Selfie and a Follow Me mode that can lock onto your GPS-enabled device and film you while you run, skateboard or walk through the city or any other open scene. With Smart Shots, you can let the twin computers do the flying while you control the camera with the toggle on the remote.
The 3DR Solo also boasts a 55mph (89km/h) top speed, which makes it insanely fun to fly. It also features a “Pause” button on the controller to command your Solo to stop and hover as well as a Safety Net function that lets you set up distance and altitude limits for safe beginner flights.
Phantom: Smart, Sporty & Simple
The Phantom 3 features an Intelligent Flight System and an advanced Internal Measurement Unit with a six-axis gyroscope and accelerometer to keep you flying level and under control at all times. The Phantom 3 Professional’s upgraded GPS gives you access to a minimum of 36 GPS and GLONASS satellites at all times, enabling quicker link ups and more reliable flight in remote areas.
The Phantom 3 Professional (as well as the newly released Phantom 4) features a Vision Positioning System that works a lot like SONAR to enable stable while flight indoors. That opens up an entirely new indoor world of photographic possibilities; however, we recommend using prop guardswhen flying inside.
While only topping out at 35mph (57.6km/h), the Phantom 3 Professional may not be as fast as the Solo, but its Intelligent Flight Battery keeps you in the air for three extra minutes, which is a lot when you’re snapping one-in-a-million photos of a sunset in Hawaii. Also, the battery recharges a bit quicker than the Solo’s.
Somewhat recently DJI developed Intelligent Flight Modes (much like the Solo), so you can set your Phantom 3 to follow you, orbit a point of interest, take epic fade-away selfies and even set it to fly along a series of GPS waypoints. As with Smart Shots, DJI’s Intelligent Flight Modes let you concentrate on controlling the camera so you can dial in amazingly stable shots that captivate your audience.
Camera & Gimbal:
Solo:The Great GoPro in the Sky
Now we come to the main difference between these two amazing drones: the camera. First off, the 3DR Solo doesn’t come with a camera, but it was developed closely with GoPro in an effort to become the world’s best flying platform for the world’s most popular action camera. Depending on the user, that can be good or bad. If you already own a GoPro, then you don’t have to shuck out the extra cash, but to get the full 4K UHD video at 30 frames per second that we listed above, you’ll need a GoPro HERO 4 Black.
NOTE: You can only get complete functionality with your Solo with the GoPro HERO 3+ Black, HERO 4 Silver or HERO 4 Black. However, you can use a GoPro HERO 3+ Silver for video only.
The main perk of using a GoPro with the Solo is utilizing the GoPro’s wide range of photographic possibilities. However, aerial footage captured with your GoPro/Solo combo will likely require a good amount of editing. The GoPro HERO 4 Black also captures a wider field of view (depending on setting), so you get more of the sunset or mountain scene in your footage. That footage might show “jello” artifacts or a slightly distorted fisheye effect, but that can be remedied by cropping out the edges of your footage, using ND filters or by adjusting the camera’s frame rate. Basically, with a GoPro on your Solo, you’re going to get more raw video to work with, but you’re going to have to spend a little more time editing than you might with a Phantom 3.
Other awesome perks of using a GoPro are the many photo burst modes available. Instead of recording video, you can set your camera to take up to 30 12 megapixel photos a second or as little as three photos per second. That enables a more passive way to capture quality aerial photography while you focus on flying and framing shots.
One of the main selling points of the 3DR Solo has to be the Solo Gimbal. With help from GoPro, 3DR successfully designed the first-ever gimbal with full control over a GoPro (including access to all settings), which gives you the ability to pan, tilt, snap stills and initiate Smart Shots. Plus, it provides cinema-worthy stability while flying. If you’re looking at buying the Solo, we strongly recommend springing for the version with the gimbal: the 3DR Solo Quadcopter with 3-Axis Gimbal.
Phantom 3:Simply Stunning
Thanks to its powerful camera, the DJI Phantom 3 is the easiest way to capture eye-popping aerial photo and video with full 4K UHD and 12 megapixel resolution. That’s because the mounted camera was designed specifically for aerial photography and filmmaking, which limits distortion and greatly reduces the editing required to achieve professional-level content. An abundance of advanced camera settings are available through the DJI Go App, including 3/5/7 photo burst modes and time-lapse. The Phantom 3’s 20mm lens also accepts ND and circular polarizer filters to further fine tune your image capture.
Since the camera and gimbal are completely integrated into the Phantom 3, there is no installation necessary, which means quicker pre-flight checks and less overall stress on the gimbal. The gimbal itself provides reliable stability and buttery smooth tilting, whether you’re controlling it manually or using one of the many Intelligent Flight Modes. The Phantom 3 gimbal is a bit more delicate than the Solo, but it comes with a gimbal guard that you can use to protect it during transport.
Remote Controller:
Solo:HDMI Out FTW
First off, 3DR installed a 1GHz computer into the Solo controller, which helps with some of the Solo’s processing power and even saves detailed flight data within the controller itself. That can be useful in the event of a flyaway or serious crash, because if you can use that data to prove the crash was the result of a malfunction, then 3DR will replace your Solo AND your GoPro.
Another obvious difference is a data screen that displays airspeed, battery status, altitude, gimbal angle and other flight data. As for devices, the controller connects to a smartphone or small tablet via the device’s Wi-Fi, sending it out to your Solo up to a half-mile away.
Probably the coolest feature of the Solo controller is its HDMI port, which sends out a live 1080p HD video feed for use with FPV goggles, a TV monitor or even to stream your flight live online. This small feature can greatly expand the applications of your Solo and provide a one-of-a-kind flying experience.
The Return and Land at Home button, gimbal control, camera shutter button and even the ability to customize buttons are standard on both the Solo and Phantom controllers, but are all useful features that get a lot of use during flight sessions.
Phantom 3:Greater Range with Lightbridge
The Phantom 3 controller follows the same basic twin joystick design, but it allows you to use a full-size tablet for a larger live HD view of your drone flight. It also uses DJI’s Lightbridge USB connection to speed up the data transfer between your device and the controller to reduce video lag.
With a transmission range of up to 3.1 miles, the Phantom 3 beats the Solo’s range by a couple miles, but with current FAA UAV regulations, drone pilots in the U.S. are required to keep their drone within sight at all times. That brings the realistic (or legal) range back to around a half-mile anyway, so that difference may be negligible for U.S. users.
While the Solo features a Pause button on its controller, DJI has the same ‘stop and hover’ command built into its Intelligent Flight System controls. Every time you release a joystick, your Phantom 3 stops and hovers in place until you tell it what to do next. While a pretty basic feature, it can really help first-time pilots gain confidence and re-orient themselves during flights.
Mobile App:
Both 3DR and DJI have done a great job developing apps that elevate the flying and filmmaking experience with their drones. They both are iOS and Android compatible, both provide a live 720p HD view, both allow enhanced camera control, both enable easy content sharing, both include a flight simulator, both give you access to a live GPS view of your flight and both control automated flight modes.
Solo: Get Your Dronecode On…
On top of all the overlapping features, the Solo App has been said to be a bit easier to operate right out of the gates, giving first-time users a quicker learning curve. That’s most likely because of its simpler display (with a majority of the flight data appearing on the controller’s built-in LCD screen).
For many drone enthusiasts, the most attractive feature of the Solo App will be its open source DroneKit SDK and web API, which enables users to hack the software and develop new apps. The open platform is backed by the Dronecode Foundation and lets software developers and hobbyists create new apps to add new functionality to your Solo drone, to enhance your flight experience on your device or to even customize how your Solo shares and uploads data to the DroneKit Cloud. This is the software side of 3DR’s “Made for Solo” development program, which hopes to jumpstart small companies while also improving the capabilities of the Solo and drone technology in general. For enthusiastic drone advocates, this could be an attractive company philosophy that is easy to get behind.
Last but not least, the Solo App lets you update all of the Solo’s firmware wirelessly. Compared with the Phantom 3 update process, it’s virtually automatic and gets you flying much sooner after an update becomes available.
Phantom 3: Advanced Settings for Photogs
For the Phantom 3, the big selling point for photographers is the wide variety of advanced camera settings available through the DJI Go App. Being able to quickly change ISO, resolution and frame rate lets you properly tune your camera to match the conditions while you fly. Plus, you can easily stream your flight on YouTube and blow away your loyal fans.
DJI also allows app development with the Go App’s SDK, but it really only lets you create new apps that work with your mobile device, instead of making the entire flight system open.
The DJI Phantom 3 Professional Droneis available for $999.00 at GoWorx.com. We used the Phantom 3 Professional for our comparison, but other Phantom 3 models are also available, ranging from $499-799 with various differences in flight and camera features. Explore and shop the full Phantom 3 drone line here.
Also, the DJI Phantom 4 Drone has recently become available and offers a whole slew of new features to discover.
Overall Impressions:
Solo:
Overall, the 3DR Solo is a powerful, easy-to-use quadcopter that lets you use your GoPro HERO camera as an eye in the sky to shoot stunning aerial imagery. You can most definitely create the same stunning content as the Phantom 3, but there may be a little more practice, editing or fine tuning involved in the getting the final product.
It is definitely ready to fly right out of the box, but 3DR’s decision to make it an open platform means that it will be eligible for hardware upgrades, software hacks and other improvements as they come down the pipe. You could say the Solo is like Android, and the Phantom 3 is more like Apple, but don’t let that discourage you one way or another.
Phantom 3:
The Phantom 3 is an all-encompassing and incredibly easy way to capture amazing photo and video from the sky. It has become the most popular choice for beginning and experienced drone pilots because of its combination of simplicity and robust features.
The software upgrades like Intelligent Flight Modes and other functions have proved that DJI is constantly working to improve the user experience in any way possible. In the end, the Phantom 3 will get you from unboxing to stunning imagery quicker, but with that you sacrifice a certain level of camera control and the ability to edit things the way you want (e.g. smaller field of view, etc.). For some particular photographers that may feel limiting, but for most people, the Phantom 3 will not fail to impress.
Bottom Line: What’s Your Intended Use & Preferences?
It’s clear at this point that there is no bad choice between the 3DR Solo and DJI Phantom 3. It really just comes down to your intended use and camera preference.
Do you already own a GoPro HERO 4 and regularly create awesome content?
Maybe the Solo can take your content to the next level.
Do you want the easiest possible way to get Ultra-HD aerial footage of your adventures?
Do you want to add an aerial view to your photography business, movie production or adventure documentation?
Pick one based on which camera you think you’d be more comfortable editing.
We are 100% confident that either of these drones will satisfy your desire to fly and create amazing content. We hope you’ve found this guide helpful. If we missed anything or if you have further insights on the 3DR Solo or DJI Phantom 3, please comment and let us know!
]]>
https://goworx.com/blogs/tips/89251267-how-to-fly-a-drone-5-tips-for-beginners2016-02-10T13:20:00-06:002016-02-10T13:15:35-06:00How to Fly a Drone - 5 Tips for BeginnersJeff Miesbauer
flying camera from DJI or 3DR, you may be wondering how to fly a drone. If so, please read this guide first. In order for you to get the most out of your drone, we have compiled these beginner tips to help you avoid costly crashes, flyaways and other dreaded drone fails.
]]>
DJI Phantom or 3DR Solo Drone, you may be wondering how to fly a drone. If so, please read this guide first. In order for you to get the most out of your drone, we have compiled these beginner tips to help you avoid costly crashes, flyaways and other dreaded drone fails.
Isn't My Drone Ready to Fly?
"Ready to Fly" could be the most dangerous three words to new drone owners. Sure, some drones are (mostly) ready to fly, but beginner pilots are not. With a million new drone pilots taking to the skies in 2016, drones have popped onto the radar of the mainstream media, politicians and critics of all calibers, and the stakes are high. In order to keep us all flying, we have to do our part to be considerate and conservative with the use of our shared airspace.
So before you take off on your first flight, take a moment to review our five tips for beginner drone pilots. Be safe out there and enjoy the view!
1. Educate Yourself
If we could give potential drone pilots one piece of advice, it would be to learn as much as possible about drones and quadcopters before even considering a purchase. Here are a few points to consider:
-Try before you buy. Get your hands on a friend’s drone, if possible. Getting a feel for the controls and the aircraft’s overall capabilities will give you an idea if this whole drone thing is for you.
-Get to know the market. What kind of drone do you want to fly? This is the first question to ask before learning how to fly a drone. Do you want to take pro-quality photo and video? Research DJI or 3DR drones. Do you want a fun toy for your kid to fly indoors? Maybe a lightweight, inexpensive quad will do the trick. Want the speed and acrobatics of FPV racing? You might have to build your own.
-If you buy, read Operations Manual twice! Not just the Quick Start Guide. Not just a YouTube tutorial. Not just this post. Some of the biggest mistakes we see come from user error during the first flight, and they could have easily been avoided with a little more instruction. Check out this guy's drone go down in a pond, yikes!
-Register your droneand know the rules in place. The basics include flying no higher than 400 feet off the ground and keeping your drone in sight at all times. There are also areas you can’t fly your drone, like within 5 miles of an airport or in a National Park. It is your responsibility to know where you can and cannot fly.
-Learn how to fly...BEFORE you try. Learn to pilot a quadcopter before you make the costly decision to take’er up right out of the box. We recommend mastering a small starter quad, that way when you get on the sticks of your new GPS-assisted DJI Phantom, it will feel familiar…if not easy. DJI’s included flight simulator is also a good place to start practicing the nuances of flying a quadcopter. Regardless of the method, learning the fundamentals of flying (pitch, yaw, roll, etc.) will give you a leg up once you’re ready to fly your dream drone. It could also save your drone and prevent unnecessary accidents.
2. Prepare Before Every Flight
Many beginner drone mistakes take place before they even get off the ground. And most of these could have been prevented with a solid pre-flight checklist. Here’s a quick list of things to consider when preparing for your first (or any) flight:
-Check for updates. Before you head out the door, make sure your drone AND remote are updated with the latest firmware and that your device is using the most updated app (if using a device). Depending on your drone, this could be every couple of months or every few weeks.
-Check the weather. Most novice drone pilots don’t realize until it’s too late how vulnerable their aircraft is to the wind. Even a light wind of 10-15mph can send your drone off course or make it very difficult to fly, which eats up your battery quickly. Sticking your finger in the air won’t do the trick, because things can be dramatically different even 75 feet off the ground. Check your local NOAA aviation forecast before you head out to your flight location and don’t be afraid to scrap a mission if things don’t feel right.
-Develop your own Pre-flight Checklist. The secret to a safe drone flight is a solid list of steps to check off before (and after) a flight. These lists can vary widely across drone makes and models, but most will include checking batteries, props and gimbal as well as calibrating IMU and compass, confirming GPS connection and a dozen or so other steps and system checks that will let you know you’re ready to fly.
3. Start Small
Your first drone flight should go down in your flight log as a success, not a heart-shattering failure. If you take it easy the first few flights, you’ll be flying long enough to start having real fun with your drone. When we say take it easy, we mean:
-Find a large open area to fly. An empty field works best, but any large space away from tall trees, bodies of water, roads, bystanders or anyone else’s personal property. Basically go to the most crash-friendly place you can find. Flying over backyards, neighborhoods and popular parks is inviting disaster to more than just your drone.
-Treat the first like a test flight…because it is a test flight for you AND your drone. Take off, hover and then land again. Take off again, climb to 10 feet, hover and test each command on your remote. Make sure your drone stabilizes itself after each command. Send it on a simple straight-line mission and bring it back. Try a few more simple maneuvers, test your camera and then call it a day.
-Don’t get cocky. Resist all temptation to see how high it flies, how fast it can fly or how close you can buzz your neighbor’s house. This is the kind of essential common sense that prevents flyaways, property damage and a bad reputation for all drone and UAV pilots.
4. Awareness is Everything
With a capable aircraft, the sky seems like an infinite space where we are free to roam to our heart’s content. Sure, that was the case for the Wright Brothers, but pilots nowadays must be acutely aware of their surroundings at all times. Here are some things to watch out for:
-Objects in your flight path. Of course you’ll be watching out for power lines and trees, but if you live in a farming community be sure to keep an eye out for sudden low-flying aircraft. Sometimes, emergency helicopters fly low unexpectedly, so always keep an eye on the sky and get out of their way.
-Interference. You can’t see this one, but you can take cues from your surroundings. Buildings, houses and some radio antennae can emit signals that confuse your drone’s flight controller. There have even been reports of pilots losing control of their drones because of their neighbor’s Wi-Fi booster. All the more reason to fly in wide-open areas without people or buildings within range of your remote.
-Raptors. It’s a mistake to think that you’re the only thing flying up there, or that you’re a master of the sky. Falcons, hawks and eagles have a few million years of evolution to unleash onto your Phantom if you give them the chance. In a raptor vs. machine dogfight, the raptor almost always wins, and there’s no way they can fly away without injury from a drone’s props. If you see birds of prey in the air, our advice is to let them have it.
-Animals. While we’re on the topic, it’s pretty apparent that drones and animals don’t mix. Dogs in particular seem to have a disdain for drones. To them it’s a flying vacuum cleaner that must be destroyed. Our advice: leave your dogs at home.
5. Don’t Neglect your Device
Last but not least, it’s important to make sure your smartphone or tablet is in proper working order before using it with your drone. Since it plays an integral part in controlling your drone’s flight and camera, you shouldn’t overlook it in your preflight checklist. Here are some ways to get your device ready for a flight:
-Switch to airplane mode if possible. If you don’t need Wi-Fi to connect to your drone or GPS, turn it off to free up extra memory to run your drone’s flight app. Plus, that prevents someone from calling you and ruining your spectacular sunset footage.
-Bring back-up power. Most drone pilots bring extra batteries for their drone, so why not bring extra power for your other devices? We love the Outdoor Tech USB Power Banks to keep our devices online when outdoors.
-Turn off GoPro Wi-Fi. On some models, the Wi-Fi from your GoPro can interfere with your drone's remote control because they use the same frequency. Unless you know for sure that they are different, it’s a safe bet to turn off the GoPro Wi-Fi and avoid losing control and crashing into a tree.
Have any other tips for beginner drone pilots? Please share them with us in the comment section or tag us on Facebook or Instagram. Happy flying!]]>
https://goworx.com/blogs/tips/89257027-5-smartphone-photography-tips-for-better-photo-video2016-01-20T23:00:00-06:002016-02-18T19:01:33-06:005 Smartphone Photography Tips for Better Photo & VideoJeff Miesbauer
A new year is here, and it’s time to take your photo and video to the next level with our 5 smartphone photography tips.
Not all of us have a DSLR, GoPro, and/or Drone to snag that epic footy. Even if you do, you should never leave behind a good backup. The Smartphone, while not the best out there, is still an excellent choice for beginners looking to get started and for professionals needing a second angle (and who knows when the action will find you without a GoPro?).
]]>
A new year is here, and it’s time to take your photo and video to the next level with our 5 smartphone photography tips.
Not all of us have a DSLR, GoPro, and/or Drone to snag that epic footy. Even if you do, you should never leave behind a good backup. The Smartphone, while not the best out there, is still an excellent choice for beginners looking to get started and for professionals needing a second angle (and who knows when the action will find you without a GoPro?). For action/adventure photographers, videographers and iPhoneographers that are ballin’ on a budget and need pro shots, these smartphone photography tips are for you.
Tip #1: Settings
While you might think it goes without saying, the primary settings on your phone's camera should never be overlooked. Here are some to look out for (most of these are available on both Apple and Android devices):
Grids
Using a grid with your camera app lets you to size up the picture against visible lines, break up the image into sections and capture your subject with respect to the Rule of Thirds (see #5). It's an easy visual guide to help you compose a show-stopper, or at least an Insta-scroll stopper.
HDR
When activated, HDR (high-dynamic-range imaging) snaps three quick shots (underexposed, overexposed and normal photos) and combines them to achieve perfect contrast. Overall, HDR is a solid go-to setting in challenging lighting or for quick photo-ops.
Aspect Ratio
Double check your camera's settings to ensure you're using the highest resolution available, and don't change up the aspect ratio to 16:9 unless you know for sure that you have a 16:9 image sensor (most are 4:3). If you want widescreen images or video, crop them later (see #3) instead of limiting the view of your camera's sensor.
Auto White Balancing
Experimenting with your camera's white balance settings (or using a third-party camera app to get around your iOS device's auto white balance) can give you a whole new range of photographic possibilities. You can correct harsh fluorescent lighting, "warm up" over-exposed daytime shots as well as snap unique, unnatural colors for your artsy camera roll.
Voice Control
An easy hack for increasing camera stability is to set up voice control of your camera app. That way you can use both hands to stabilize your phone and you don't have to tap the screen and botch your camera's focus at the worst possible moment.
Auto Stabilization
Cashing in on your camera's auto stabilization (or getting an app that has it) is a quick way to remedy the shakes common in smartphone videos, but they can only help smooth out light turbulence. Scroll down to #2 for the best tools for stabilization.
File Storage
A vital aspect of digital photography, file storage can derail a photo session if you run out of memory on your device in the middle of a shoot. Backing up photo and video with Google Drive or Apple's iCloud after each session will ensure you have the space to snap as many photos as you need to get the perfect shot.
There are loads of apps and settings out there. Explore and see what works best for you and your device.
Tip #2: Accessorize
We build and sell the best mobile photography and iphonography products we possibly can, so if you need a tripod mount or a stable handheld mount go with the FreeRide Phone Mount. Outside of these needs there are still plenty of important accessories to consider if you want to get the best shots from your phone… especially if it's riveting action or adventure footage.
One of our biggest recommendations for accessories is undoubtedly lenses. There really is no faster way to turn your phone into a powerhouse capture machine than investing in a high-quality lens pack. We carry olloclip iPhone Lenses because they are the best.
Running out of power will ruin your day. Having standby power such as an Outdoor Tech Kodiak USB Power Bank guarantees you'll have power and never miss a shot.
Another easy one is a reliable case. Hitting some surf or powder? Consider a highly secure case that will keep everything clean and dry.
Need to steady the shot and take a step back? Tripods could be the answer, especially if you are out there shooting solo.
Beyond accessories, check out ways to expand storage (on some Android models), apps to help aid photo capture/composition and microphones if you need good audio (common for vloggers).
Pro #3: Edit After Shooting
While you might be tempted to enhance the initial capture with fancy bells and whistles, there is way more value in getting the perfect shot and editing afterwards. You should be more concerned with working the scene, getting the best shots possible and really crushing the capture than anything else. Once the epicness is in your storage, that’s where the magic starts:
Never zoom, always crop. Digital zoom on phones (despite the advancements in technology across devices) is still trash. You are far, far better off taking the shot, cropping it after, and blowing it up to size later.
Who needs filters when you can edit? Look, we all love filters. But you can get better results with editing software. Whether it’s an editing app on your phone or Photoshop (or one of its free competitors) on your computer, taking a couple hours to learn how to adjust colors, saturation and contrast will let you get things looking exactly how they need to look to blow up on the gram.
Front camera? Not even once. There is no debate here. If you need to hold the cam steady why not scroll to Tip #1 and check out voice command features (if available on your device).
Stabilization is your friend. While the built-in stabilizers are pretty decent on some smartphones, you are probably better off bouncing footage to a program like Premier Pro and using its stabilizers. This can really make the difference and save great footage that was just too shaky before.
Pro #4: Shoot Video in Airplane Mode
The thought of all the sick footage that has been ruined by a call from work, or the bank, or mom, or anyone else absolutely breaks our hearts. This tip is a little lightweight compared to the rest, but we include it because it is mission critical!
There are two types of people in this world: those who don’t care to turn on airplane mode while shooting footage because it hasn't happened to them, and those who have and will never forget to do it again.
Pro #5: Learn the Basics of the Craft
This has less to do with your phone, and it probably receives way too much attention in the other guides we have come across, but it still stands: Photography and videography are arts, and there are a couple centuries worth of masters who have created best practices for you to follow.
Do the following terms ring a bell?
Rule of Thirds
A concept to help you compose interesting and aesthetically appealing imagery. In short, divide your camera's view into thirds vertically and horizontally (a nine square grid) and orient the horizon, your subject, lines or other points of interest along these invisible lines. A grid setting can help get you rolling.
Fill the Frame
When taking portraits, it's good practice to fit people tight in the frame instead of stepping back and letting the background swallow them. This is true for wildlife, pets and other subjects that benefit from closer perspectives. If you want to photograph something, get in there and make it the undisputed focal point.
Line Out
In photography, lines are your friends, especially lines that lead the viewer's eyes out from the foreground into the background, providing depth. A road or shoreline extending to the horizon are great examples. Diagonal lines, curvy lines, implied lines and S-curves are all interesting and worth fitting into your compositions.
Rule of Odds
Simply put, take pictures of odd things. No, not weird things (well, that works for some people). We mean odd numbers. It has been proven that compositions with odd numbers of people, puppies, pieces of pie, etc. are more visually appealing and make for well-balanced photographs. This probably won't work for wedding photography, but hey, these are guidelines.
Never heard this stuff before? It's time to study up! Learning from those who have come before you will move you one step closer to taking professional-quality smartphone photos (and then tagging #GoWorx when your Instagram picture gets 83 million views).
We hope you enjoyed this fresh perspective on stepping up your smartphone photography game. The phone should not be overlooked as an excellent secondary camera for pros and a completely suitable primary camera for anyone! If you have your own tried-and-true smartphone photography tips, please let us know!]]>
https://goworx.com/blogs/tips/89581891-the-complete-guide-to-drone-registration2015-12-15T23:00:00-06:002016-02-07T12:44:45-06:00The Complete Guide to Drone RegistrationEdwin Leskin
Wondering how to register your drone with the FAA? Well, we have all the answers...
Just in time for the holidays the Federal Aviation Administration has made its first major move on Drone regulation in the form of a national registry, and if you don’t comply “you are subject to civil and criminal penalties.” But don’t worry, we can show you exactly what you need to do to ace the Unmanned Aircraft Systems (UAS) Registration on December 21st, as well as some of the fine details that we are sure you’re wondering about.
Do I need to sign up?
If you have a drone weighing less than 55 pounds and more than .55 pounds, then yes. This includes all DJI Phantom drones, the 3DR Solo, and pretty much all consumer quadcopters. The Karma Drone coming soon from GoPro will also more than likely fall into this category.
Are you a business using drones for your enterprise? You do not need to do the new signup, not yet at least. You can continue using the paper-entry you have used in the past.
Do you plan on using your drone? Yes? Well, registering your drone might be a good idea because ANY outdoor usage, even on your own property, must be accompanied by certification… even if your drone is homemade.
Buying your 12 year old daughter a DJI Phantom 3 for Christmas (lucky)? Then yes. Users 13 and older have to register themselves, but it’s your job if they are younger.
If you already own your drone, you do have to register it but you get an extra 60 days!
But why should I sign up?
The FAA has threatened both civil and criminal sanctions up to the tune of $27,500 and $250,000 respectively… so ya, there’s that.
Why do they want you to sign up? To increase “traceability” in the event of an “incident”. Also, to help you find your drone if it’s lost… sure.
Ok… I’ll do it I guess. How do I sign up?
On December 21st you can go to FAA.gov to start their new online “streamlined” registration process.
There you will have to provide name, address, and email. Then you set up your account
You do NOT have to enter the make, model, or serial numbers of your personal drones.
“But I own like 30 drones, I am an addict, do I have to do this 30 times?!” No, you can do it once and apply your registration number to all of them.
You will have to pay $5 to register, but the first 30 days are free! (As in you can sign up and then wait to pay)
You won’t have to renew this $5 registration for three full years, so don’t worry, it’s not monthly.
Alright, Uncle Sam’s got my number, am I done yet? I want to go fly my drone!
No, you’re not done yet.
After you signup you will get a certificate by email, as long as you can pull it up on your phone, you’re good! If someone borrows your drone they need access to it also.
Now for the last step, you will get a unique registration number in your email. Just write it in a legible manner anywhere on your drone(s) that is accessible without tools.
Alright, I did it, anything else I need to know?
Be sure you are familiar with laws regarding fly-zones and usage. Aside from that, feel free to brush up on the details at the following links:
We hope that this guide helps demystify the process.
Now get out there and start flying!
image credits: Wikipedia creative commons information taken directly from the Federal Aviation Administration's website
]]>
https://goworx.com/blogs/tips/89589891-2015-goworx-holiday-gift-guide-our-10-best-gopro-accessories2015-11-20T23:00:00-06:002016-02-07T14:04:24-06:002015 GoWorx Holiday Gift Guide: Our 10 Best GoPro AccessoriesJeff Miesbauer
To help you navigate the merry mayhem this Holiday season, GoWorx wrangled our absolute best GoPro accessories into a gift guide worthy of any GoPro guru on your shopping list.
Considering design, functionality and innovation, we handpicked tools that enhance the capabilities of any GoPro HERO camera enthusiast, enabling creativity in ways not previously possible. This year, give them the gift of unlimited content creation when you shop with our designer-curated guide.
]]>
To help you navigate the merry mayhem this Holiday season, GoWorx wrangled our absolute best GoPro accessories into a gift guide worthy of any GoPro guru on your shopping list.
Considering design, functionality and innovation, we handpicked tools that enhance the capabilities of any GoPro HERO camera enthusiast, enabling creativity in ways not previously possible. This year, give them the gift of unlimited content creation when you shop with our designer-curated guide.
Strap + Mount = Awesomeness Wherever there’s a strap, there’s a new GoPro perspective waiting to be utilized by the Peak Design POV Action Mount. The applications are only limited by your imagination, because you can secure this mount to any strap, belt or piece of webbing less than three inches wide. With this mount clipped to your backpack strap, you can record stable, first-person shots of snowboarding, skiing, biking, ultra speed hiking or whatever gets your blood pumping.
What We Love We’re pretty sure you could rig this up as a GoPro belt buckle…so there’s that. We also love the simple slide and lock design that totally eliminates the need for annoying chest-mount straps. Plus, a quick-release button lets you stash your camera while on the chairlift, which is where we spend a lot of our time.
Grip it and Rip it Built for slaying the skatepark, adventure travel or diving deep to rediscover your inner sea creature, the comfortable, “hands-free” GoKnuckles simply secures and stabilizes your GoPro camera. With this incredibly versatile handheld mount, every clip and frame of your adventure-driven life become the brush strokes of your next project.
What We Love Sure, we designed it, but we still love the feel of its smooth simplicity and its universal, “wearable” versatility during virtually any action sport or adventure. Most of all, we love the GoKnuckles fan love we’ve received from all over the world.
Master the Waterline Those insanely captivating surf shots taken half above water and half below—those were shot with a dome port like the KNEKT KSD6 Dome Port. Whether you want to shoot surfing, snorkeling, fly-fishing or puppy swim lessons, the KSD6 greatly enhances your GoPro photos at the waterline, ensuring properly focused, undistorted images that never fail to turn heads.
What We Love The attention to detail in the KSD6 design is downright impressive. It was optically matched for the GoPro HERO camera and moves the waterline away from the lens, eliminating distortion like a champ. It even increases your GoPro’s field of view so you get more of the wave in every shot.
Dive and Capture When you land the trip of a lifetime and find yourself snorkeling in Fiji, the KNEKT GP4 Trigger is what you need to easily snap photos of every turtle, dolphin, clown fish and unknown creature that swims your way. In addition to enabling steady underwater video, the Trigger transforms your GoPro into a point-and-shoot camera that can quickly capture curious dolphins and schooling fish.
What We Love Of course we love the trigger mechanism, which lets you activate your GoPro’s shutter or video on/off button with one click. Plus, its full aluminum cage protects your camera from nosey sharks and it works seamlessly with the KSD6 Dome Port for unparalleled waterline photography.
Power Up A solid gift for GoPro gurus or anyone that hates running out of battery while on the go, the Outdoor Tech Kodiak Power Bank recharges a GoPro up to six times and a smartphone up to four times. Whether heading to a backcountry cabin for a week of freeriding or heading out for a weekend of canyoneering, this power bank keeps your GoPro ready to record whatever goes down.
What We Love Waterproof, impact resistant and capable of charging power-hungry tablets—What’s not to love? Plus, this beast is a great backup for all those what-if scenarios at home, on the road or in the field.
Stickiest of the Sticky While designed specifically for supreme stick-age to surfboards, the BRLS Removable Suction Mount can mount your GoPro HERO camera to almost any smooth surface. Without attaching permanent mounts or damaging your gear, you can capture great footage from the hood of your hot rod, the hull of your northbound sea kayak or the deck of your priceless custom surfboard.
What We Love The new and improved design still provides an incredible three-point hold on smooth and slightly curved surfaces, but it’s now easier to remove so you can remount it before the next wave rolls in.
Jib for Jibbing Whether filming yourself or your buddies, the MicroJib dishes out dynamic panning and tilting that translate to massive, eye-popping shots in the halfpipe and dimension-altering perspectives during your run through the jump line. Equally capable on the snow, street or any small-scale movie set, the MicroJib enables studio-quality camera capabilities with your GoPro.
What We Love We love the internal axle design that operates with just a twist of your wrist. Plus, with a bit of resistance in the gearbox, you’re ensured steady, weighted movement. Adjustable length, heavy-duty aluminum and a locking screw…there’s lots to love about the MicroJib.
Get Low Kickflips, manuals, bluntslides... in skateboarding all the action happens at your feet. The Original Handle+ lowers the perspective of your GoPro Hero camera so you can dial in the low-angle sweet spot that is the bread-and-butter of skate films. Stable slow-motion follow shots with bumping background beats become your trademark when you let the Handle enhance your skate or snowboard films.
What We Love The original design that gave rise to GoWorx, we love the Handle’s one-piece, camcorder-inspired design that filled a wide gap in the GoPro accessory market. Effective as a handheld or stationary camera base, the Handle is still a GoWorx best seller.
One Pole Fits All From powder stashes to wave slashes and all land- or water-based action in between, the UKPro Pole 38HDF is ready for any and all domination documentation. Surfers dig this pole because it floats, snowboarders dig this pole because it’s lightweight and everyone digs this pole because it gives their GoPro HERO camera the perfect perspective to shoot their wildest, most HD-worthy moments.
What We Love We love the quick adjustment between 16 and 38 inches as well as the 360-degree mounting options. But we love the sturdy aluminum and bomber, ready-for-anything design the most.
Filter the Tropical Blues The bright blue tropical waters you see in Fiji or Maui are fantastic for diving or snorkeling, but not so much for capturing high-quality GoPro video. The SRP BlurFix Adapter w/ CYD Filter remedies that by filtering the bright colors that your GoPro just can’t quite process. The result is clear, vivid and color-correct photo or video of your fish-filled dive at the reef.
What We Love This slip-on adapter accepts all other BlurFix 55mm filters, so you can use it to attach an arsenal of filters. We also love that you can fill the CYD Filter with water to prevent bubbles and ensure unobstructed video of your favorite sea creatures.
]]>
https://goworx.com/blogs/tips/89747011-microjib-gopro-extension-pole-review-pan-tilt-your-gopro2015-11-01T23:00:00-06:002016-09-09T18:13:51-05:00MicroJib GoPro Extension Pole Review - Pan & Tilt your GoPro!Ryan Klinger
Today we're taking a look at the MicroJib GoPro pole. You've probably seen many GoPro poles out on the market, but the MicroJib sets itself far apart from the competition. Think of the MicroJib kind of like a mini camera jib you can hold in your hand. It has several functions that help enhance the way you capture your GoPro videos. While collapsed the pole is 16.5 inches, and when it's fully extended it is 33.5 inches. Not only that, but the pole can be adjusted to capture 360 degree panning or tilting shots. Let's take a closer look, and see exactly how the MicroJib works.
]]>
MicroJib GoPro pole. You've probably seen many GoPro poles out on the market, but the MicroJib sets itself far apart from the competition. Think of the MicroJib kind of like a mini camera jib you can hold in your hand. It has several functions that help enhance the way you capture your GoPro videos. While collapsed the pole is 16.5 inches, and when it's fully extended it is 33.5 inches. Not only that, but the pole can be adjusted to capture 360 degree panning or tilting shots. Let's take a closer look, and see exactly how the MicroJib works.
In the box you get the MicroJib itself, a manual, thumb screw and an extra lock screw. To mount your GoPro on the pole, you'll need either a waterproof case or the GoPro Frame. Once the GoPro is mounted on the pole, I recommend loosening the end screw so that your panning and tilting shots are smooth. Leaving the end screw tight will secure the camera in a fixed position. Extending the pole is simple, and only requires a half turn on each twist lock. If you untwist the locks all the way, it will dismantle the pole.
My first impression of the MicroJib GoPro Pole is that it is built very well. It doesn't feel cheap, and has an overall balanced design. While collapsed it can be easily stored away in a back pack or travel bag. I initially thought it was going to be heavy, but for what it can do, it's surprisingly light weight. I found it really simple to attach my GoPro HERO4 Black using the standard GoPro mounting system and included thumbscrew.
Out of the box, the MicroJib comes configured in panning mode. To pan or tilt the GoPro, simply twist the rubber gripped handle. The handle rotates the internal mechanics, which then rotates the GoPro. It takes some getting used to, but with some practice I was able to achieve some really impressive shots. Switching between pan and tilt mode requires the lock screw and L-bracket to be removed. Mounting the L-bracket on the opposite side will setup the MicroJib in tilting mode. This whole process takes no longer than 30 seconds. One thing to keep in mind is that the pole is not waterproof. If you accidentally drop it in water it’ll be okay, but over time it will damage the internal mechanics. As I mentioned previously, the MicroJib GoPro Extension Pole uses the standard GoPro mounting system, all GoPro HERO cameras are compatible, including the GoPro HERO4 Session.
What I really love about the MicroJib is that you can change up your angles really quickly. For example, if you wanted to capture a low to high angle shot, the MicroJib in tilting mode would be ideal. As you bring the pole up to a higher position, slowly twist the handle to keep the camera level. As I said previously, with practice you’ll be able to nail these shots perfectly. If you want to capture an even higher angle while attempting this shot, then you would need to fully extend the pole.
Overall the MicroJib is an excellent choice when it comes to GoPro poles. If you’re looking to capture more than just a fixed angle, the MicroJib is here to solve that problem.
Watch the MicroJib Review Video by Jeremy Sciarappa
]]>
https://goworx.com/blogs/tips/89867331-how-to-film-skateboarding-with-garrett-ginner2015-10-06T23:00:00-05:002016-02-09T09:55:48-06:00How to Film Skateboarding with Garrett GinnerRyan Klinger
When we designed The Original Handle, we got asked by many of our fans how to film skateboarding. The truth is, it's an art, not a science! It's something that can be mastered with dedication and good old creative juice. Luckily, our friend (and talented skater) Garrett Ginner has come through with some great tips and techniques for properly filming skateboarding. In the video below, he's using The Original Handle and a GoPro HERO4 Black camera, but the 'best practices' Garrett mentions apply to even the most expensive professional camera rig you can buy. Check out the video below.
]]>
The Original Handle, we got asked by many of our fans how to film skateboarding. The truth is, it's an art, not a science! It's something that can be mastered with dedication and good old creative juice. Luckily, our friend (and talented skater) Garrett Ginner has come through with some great tips and techniques for properly filming skateboarding. In the video below, he's using The Original Handle and a GoPro HERO4 Black camera, but the 'best practices' Garrett mentions apply to even the most expensive professional camera rig you can buy. Check out the video below.
Video: How to PROPERLY film skateboarding by Garrett Ginner
There are many different cameras capable of filming skateboarding well, but there are a few common traits between them. First of all, quality of image capture. Luckily, it's 2015 and pretty much every camera being introduced to the market, whether it's a Smartphone, GoPro, or DSLR, is capable of at least 1080p video capture. Your best bet is always to record in the highest resolution possible, unless you have super limited hard-drive or memory card space. It's easy to take a 1080p video and output it to 720p, or take a 4K video down to 1080p, but not vice versa. The second commonality is a wide-angle or fisheye lens. This is majorly important for filming skateboarding because it enables you to get close to the skater, and capture their entire body from a low angle. Every lens is different though, so you'll want to test out the distance between the camera and the skater to ensure you frame your shots perfectly - every time. The last thing you want is for your friend to land the trick of their life and have his head cut out of the frame! He won't be stoked about that. If you're filming with your phone, there are several aftermarket smartphone and iPhone lenses that will give you a wide-angle or fisheye perspective.
In terms of FPS (frames per second) settings, you've got a handful of options, the two most popular are 30 & 60 FPS. The settings you select are generally determined by your desired end use for the video clip. 60 frames per second means you're going to capture twice as many frames per second as 30 FPS video. That means your video will be smoother and also a better candidate for slow motion. We would highly encourage you to learn and master the capabilities of your camera so that you can capture the best footage possible in any scenario. If you're shooting with a GoPro or DSLR, there are settings options that when controlled correctly, can help improve your video quality.
Lastly, be conscious of your camera when filming. This is a skill you'll develop with practice. Keep your camera as steady as possible, and make sure you've got your shots framed really well. While filming lines and follow cams, the classic style seen in most all skateboard videos is to keep your camera low to the ground. This can be difficult as you may need to push in order to keep up with the skater. Just remember to focus on keeping your camera as stable as humanly possible. There are ways to stabilize your video in post-production, but it's always best to start with the best raw footage possible.
Disclaimer: As mentioned, if you're wondering how to film skateboarding, remember it's an art, not a science. That being said, once you master the basics, please experiment and develop your craft!
Thanks again to Garrett Ginner for the sweet video on how to film skateboarding. If you guys want to check out his skateboarding videos, visit Garrett's YouTube Channel.]]>
https://goworx.com/blogs/tips/91604995-iphoneography-the-last-iphone-mount-you-will-ever-buy2015-10-05T20:50:00-05:002016-02-18T21:55:38-06:00iPhoneography - The Last iPhone Mount You Will Ever BuyRyan Klinger
If you are an iPhoneographer, phone cinematographer or just into capturing your adventures and experiences in a creative way, the GoWorx team, known for their innovative mounts for GoPro cameras, have created the FreeRide iPhone Mount. Designed to be the last iPhone mount you will ever need, the FreeRide iPhone mount gives you full freedom to unlock your creative potential.
]]>
If you are an iPhoneographer, phone cinematographer or just into capturing your adventures and experiences in a creative way, the GoWorx team, known for their innovative mounts for GoPro cameras, have created the FreeRide iPhone Mount. Designed to be the last iPhone mount you will ever need, the FreeRide iPhone mount gives you full freedom to unlock your creative potential.
FreeRide is a fully adjustable and versatile iPhone mount that provides a secure platform for your device that can be attached to practically anything, anywhere. This gives you the freedom to use your iPhone in ways that were impossible before. If you want to attach your iPhone to a car, drone or bike handlebars FreeRide can make that happen. The only limit is your creativity. It is compatible with all GoPro mounts and traditional camera mounts (via the ¼”-20 universal adapter). The adjustable design has a range from 56.5 mm to 86.5 mm and can secure any iPhone model - with or without a case. The mount is made of a combination of tough polycarbonate and stainless steel and is water and impact resistant which makes it ideal for outdoor fun with your mobile device.
GoWorx‘s idea is to bring iPhoneography closer to the possibilities that were previously reserved for GoPro cameras. Our FreeRide iPhone Mount does just that. It opens these possibilities up and expands your iPhone’s image capturing potential.


 The
The